

I built this system for Christmas. I knew broadwell-e was right around the corner but I wasn’t sure how much it would OC and I wanted a new PC for christmas. So far it is all good, the new Broadwell-E i7-6950X is very expensive and doesn’t overclock as well as i7-5960X.
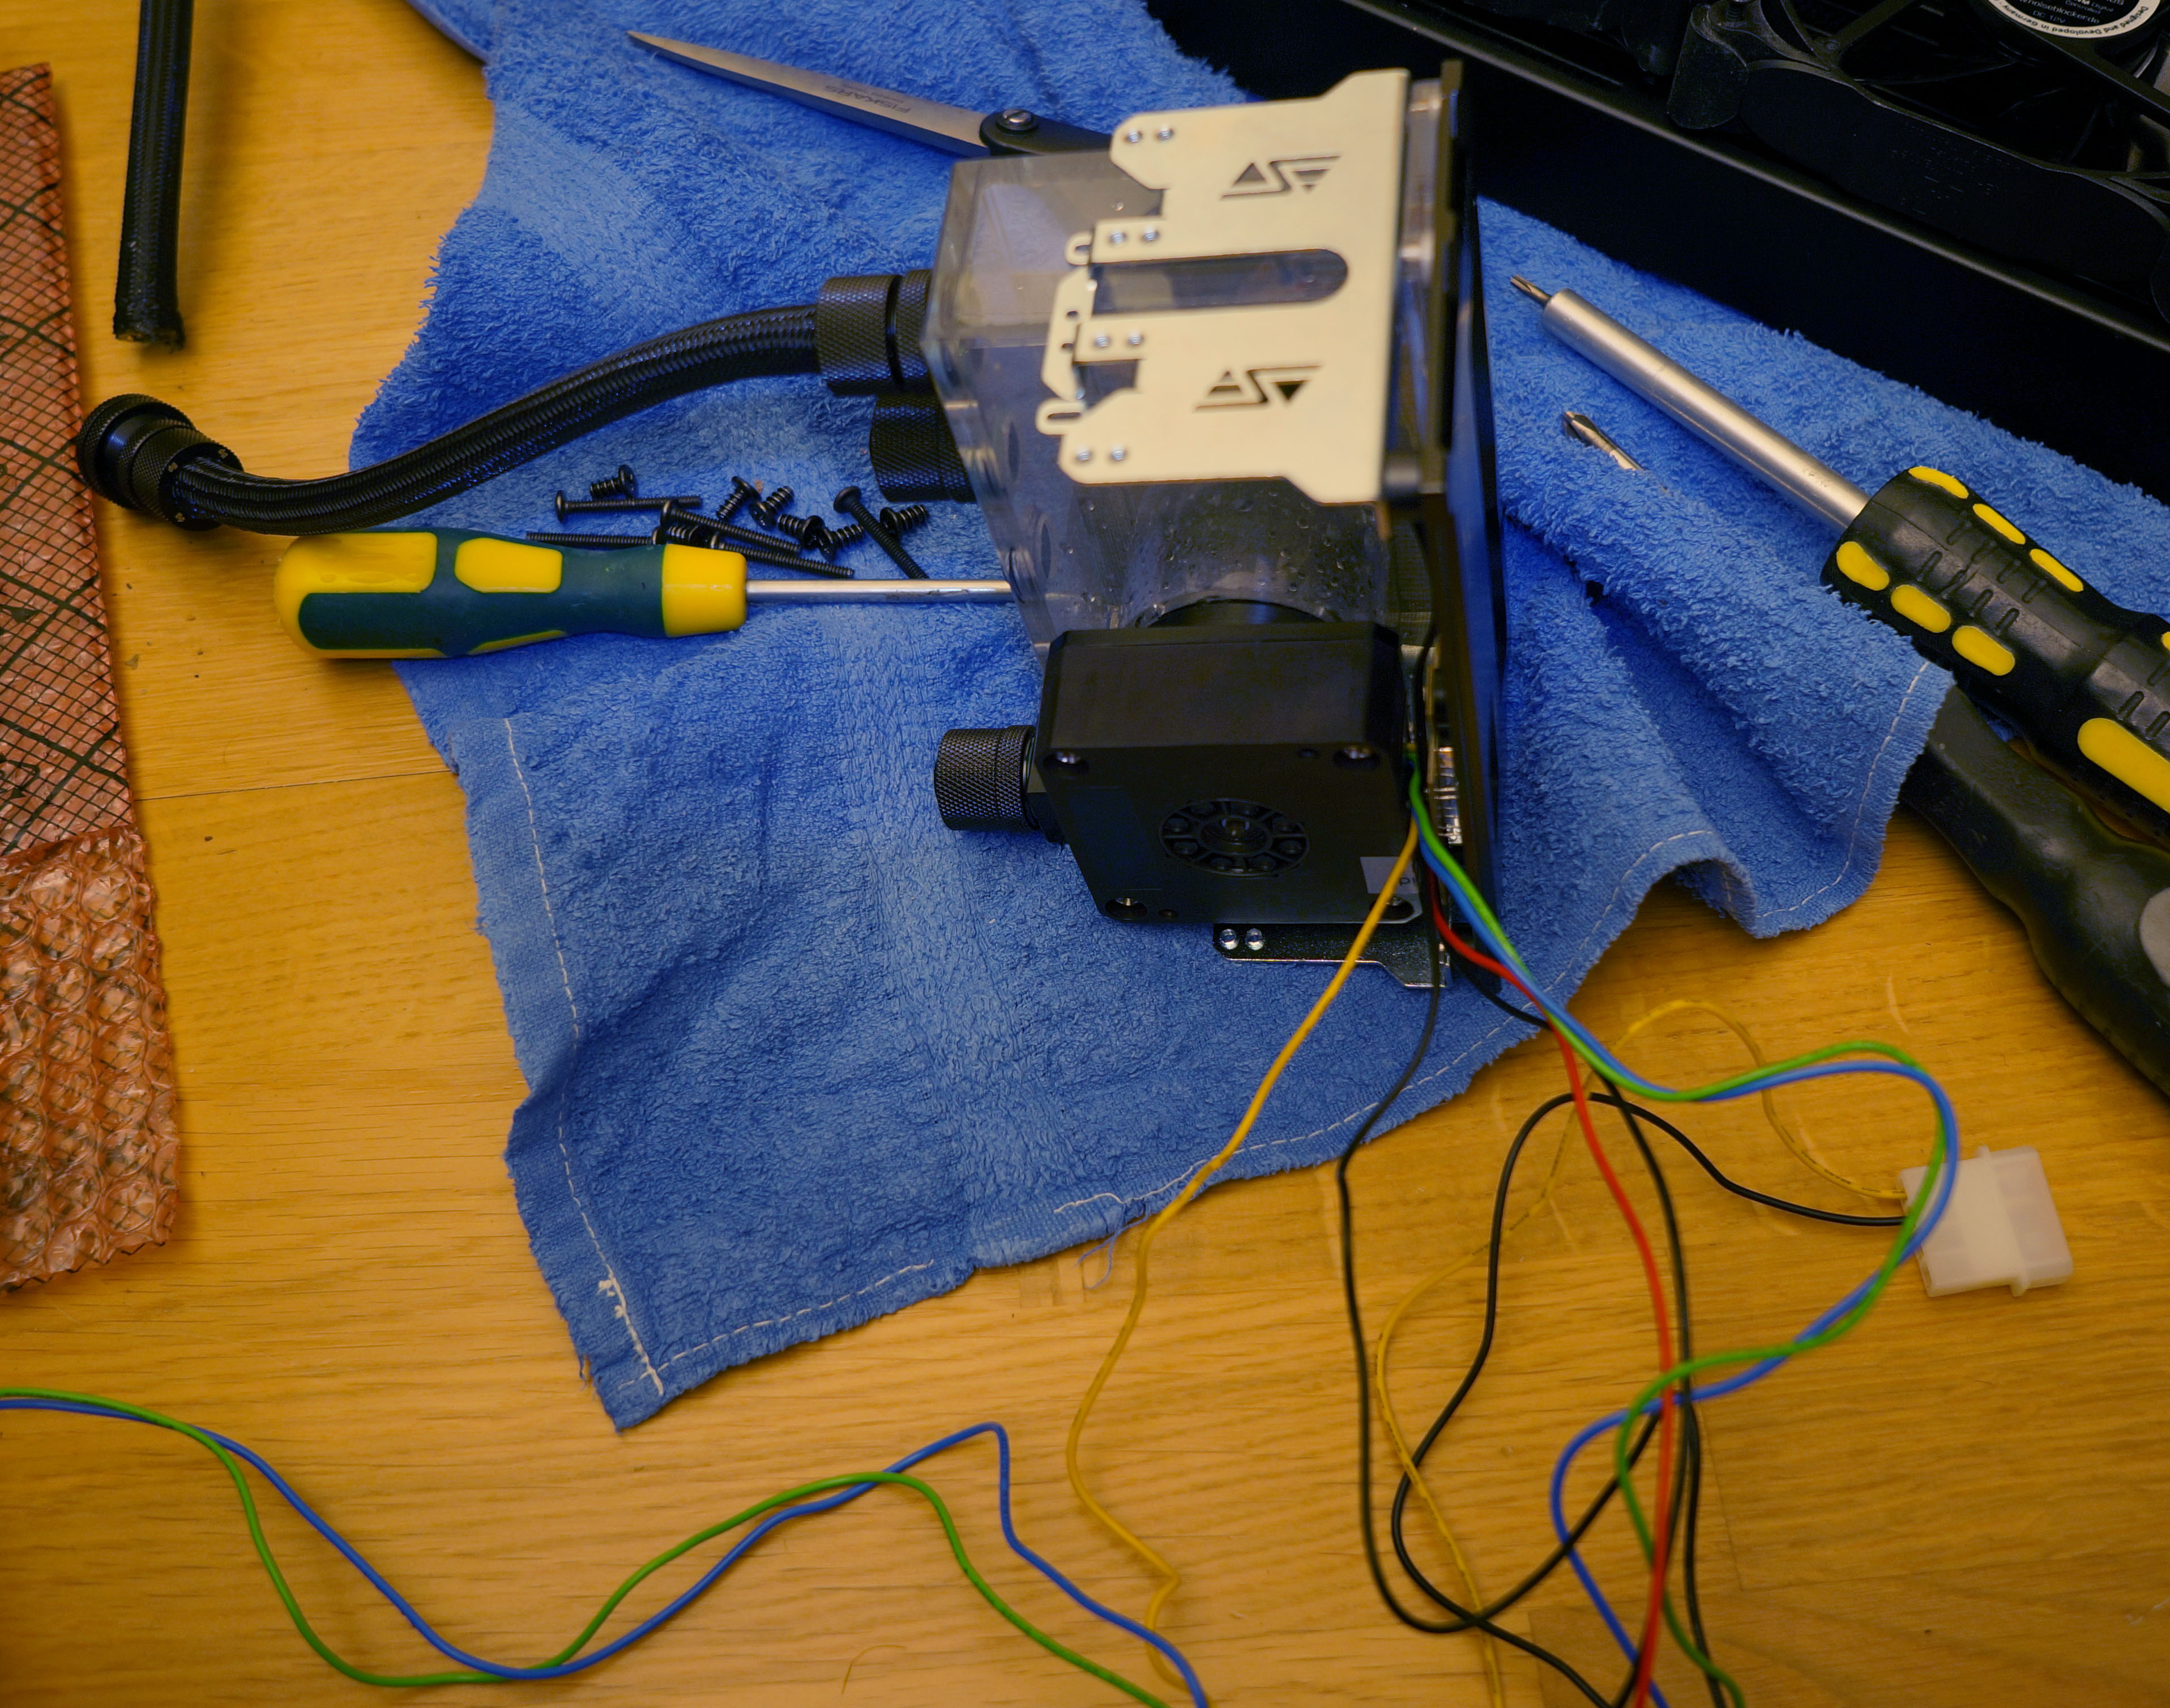
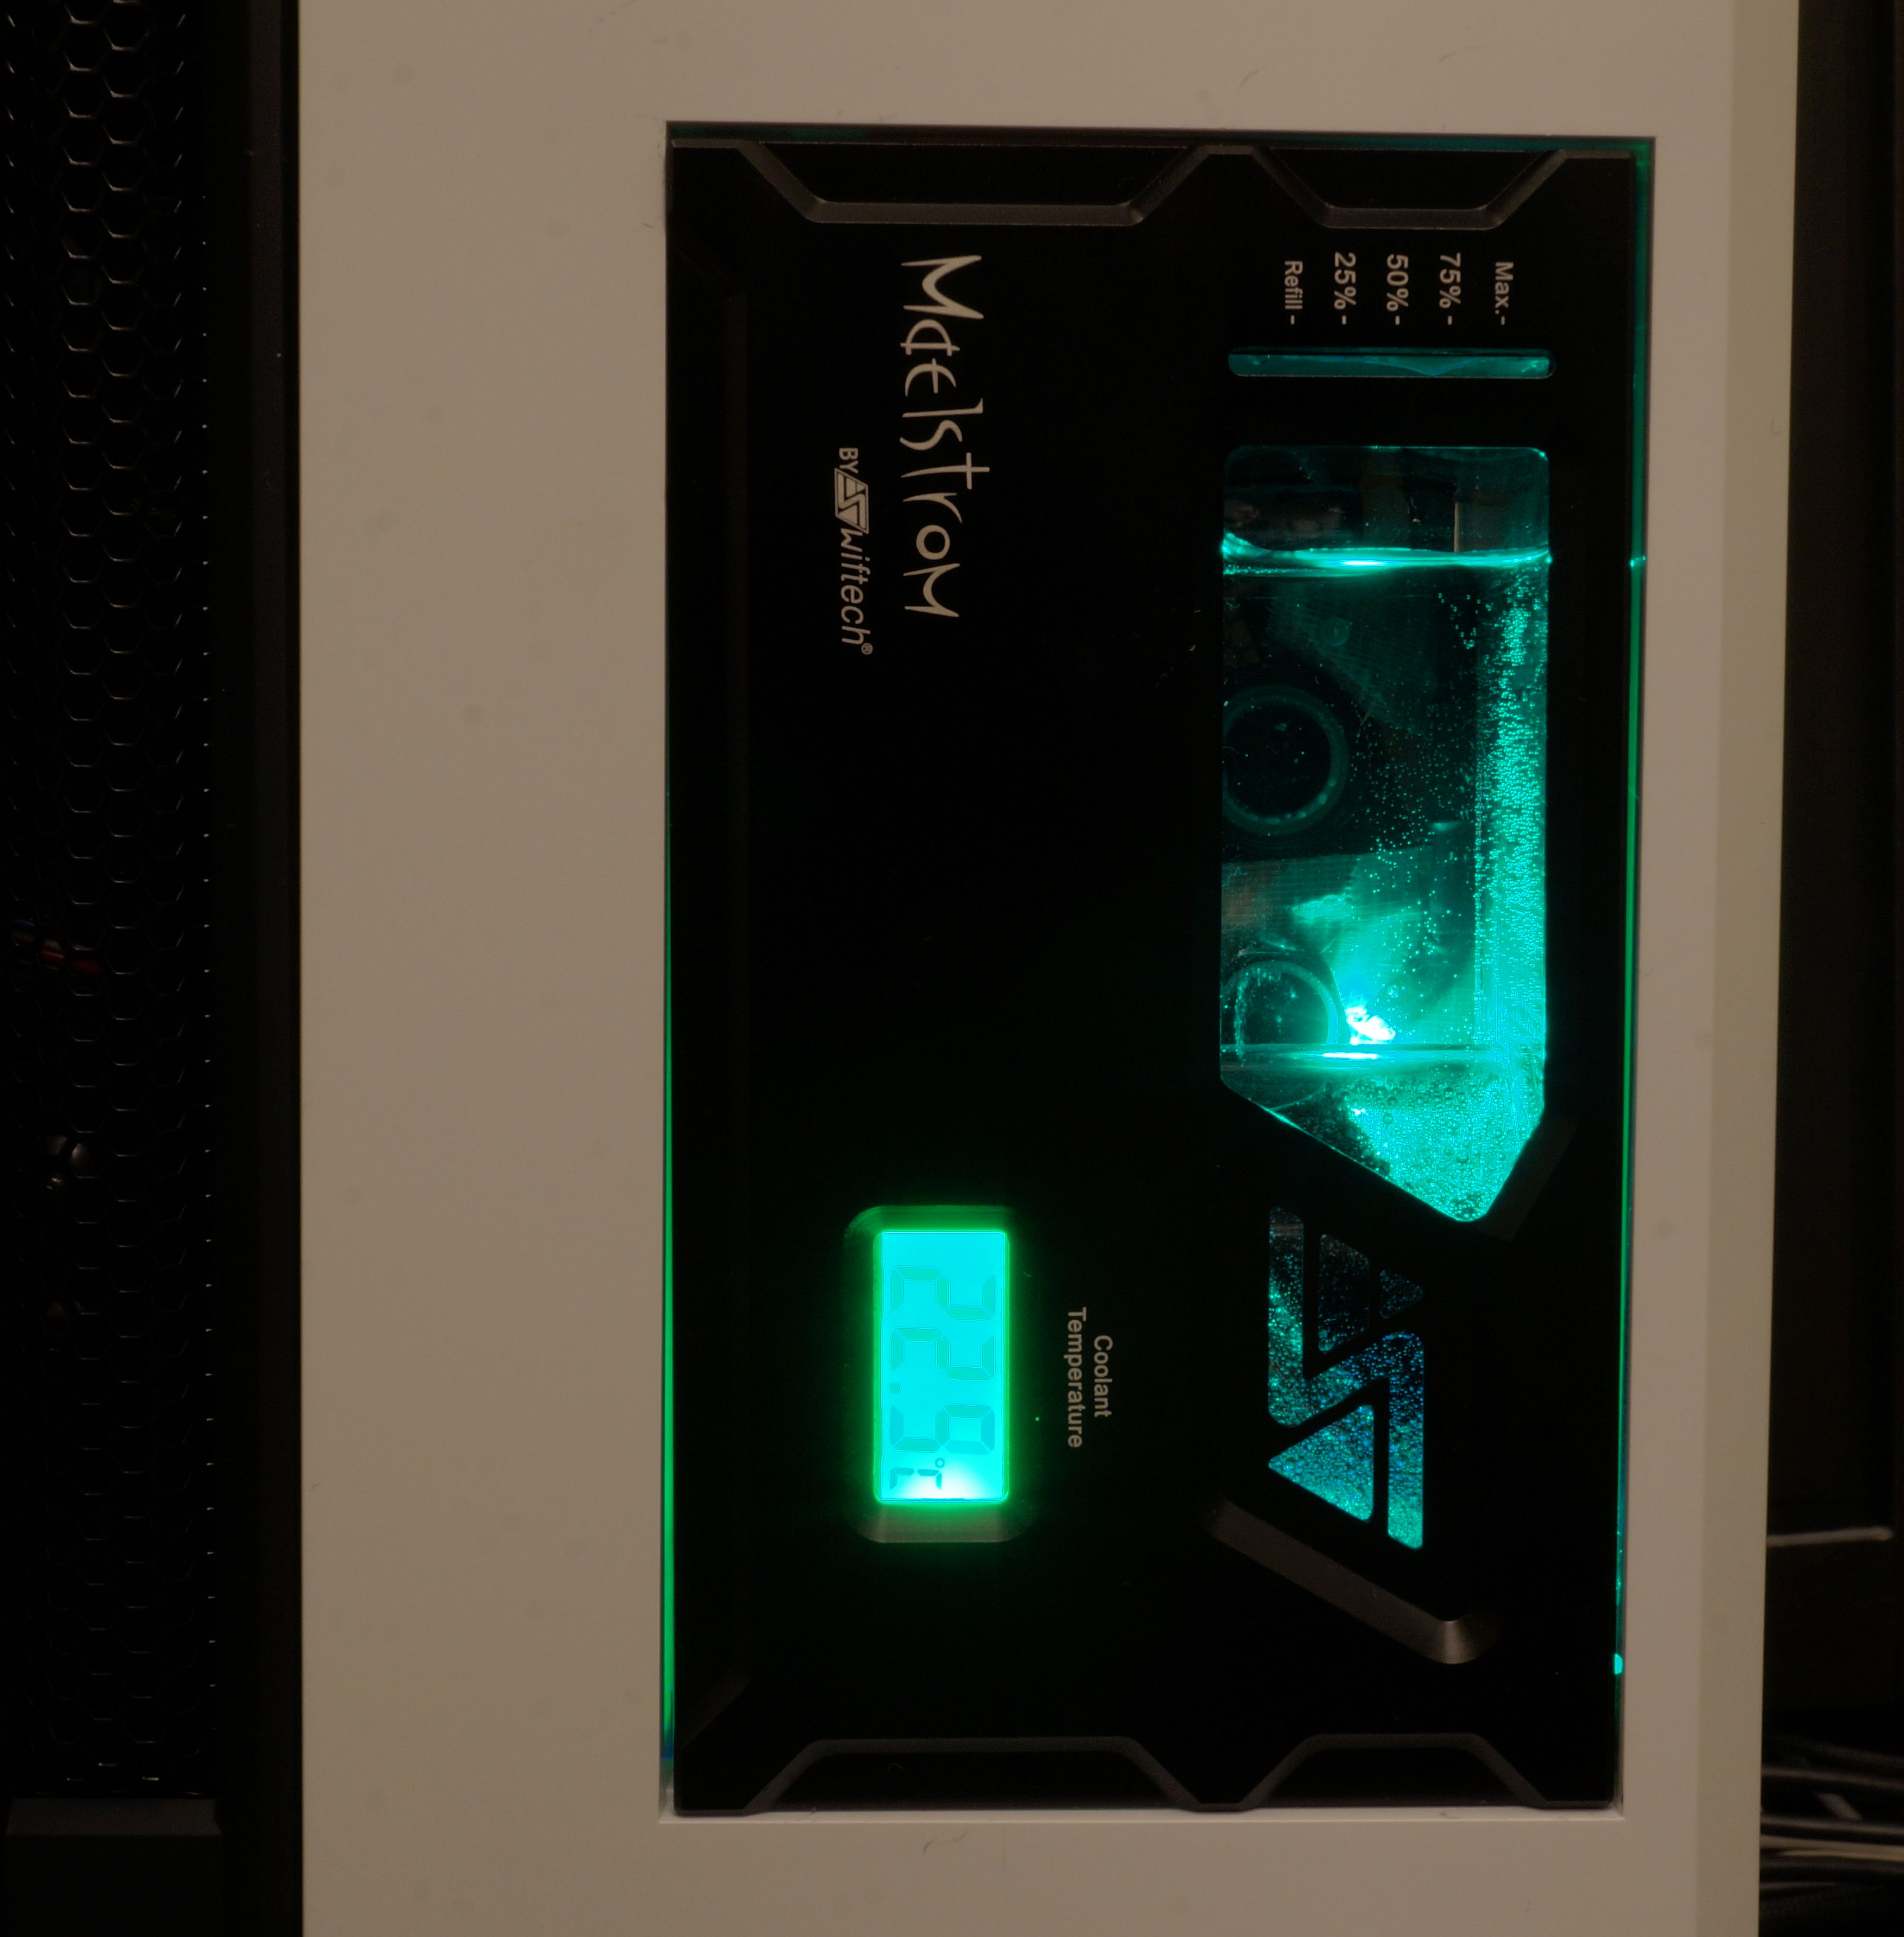
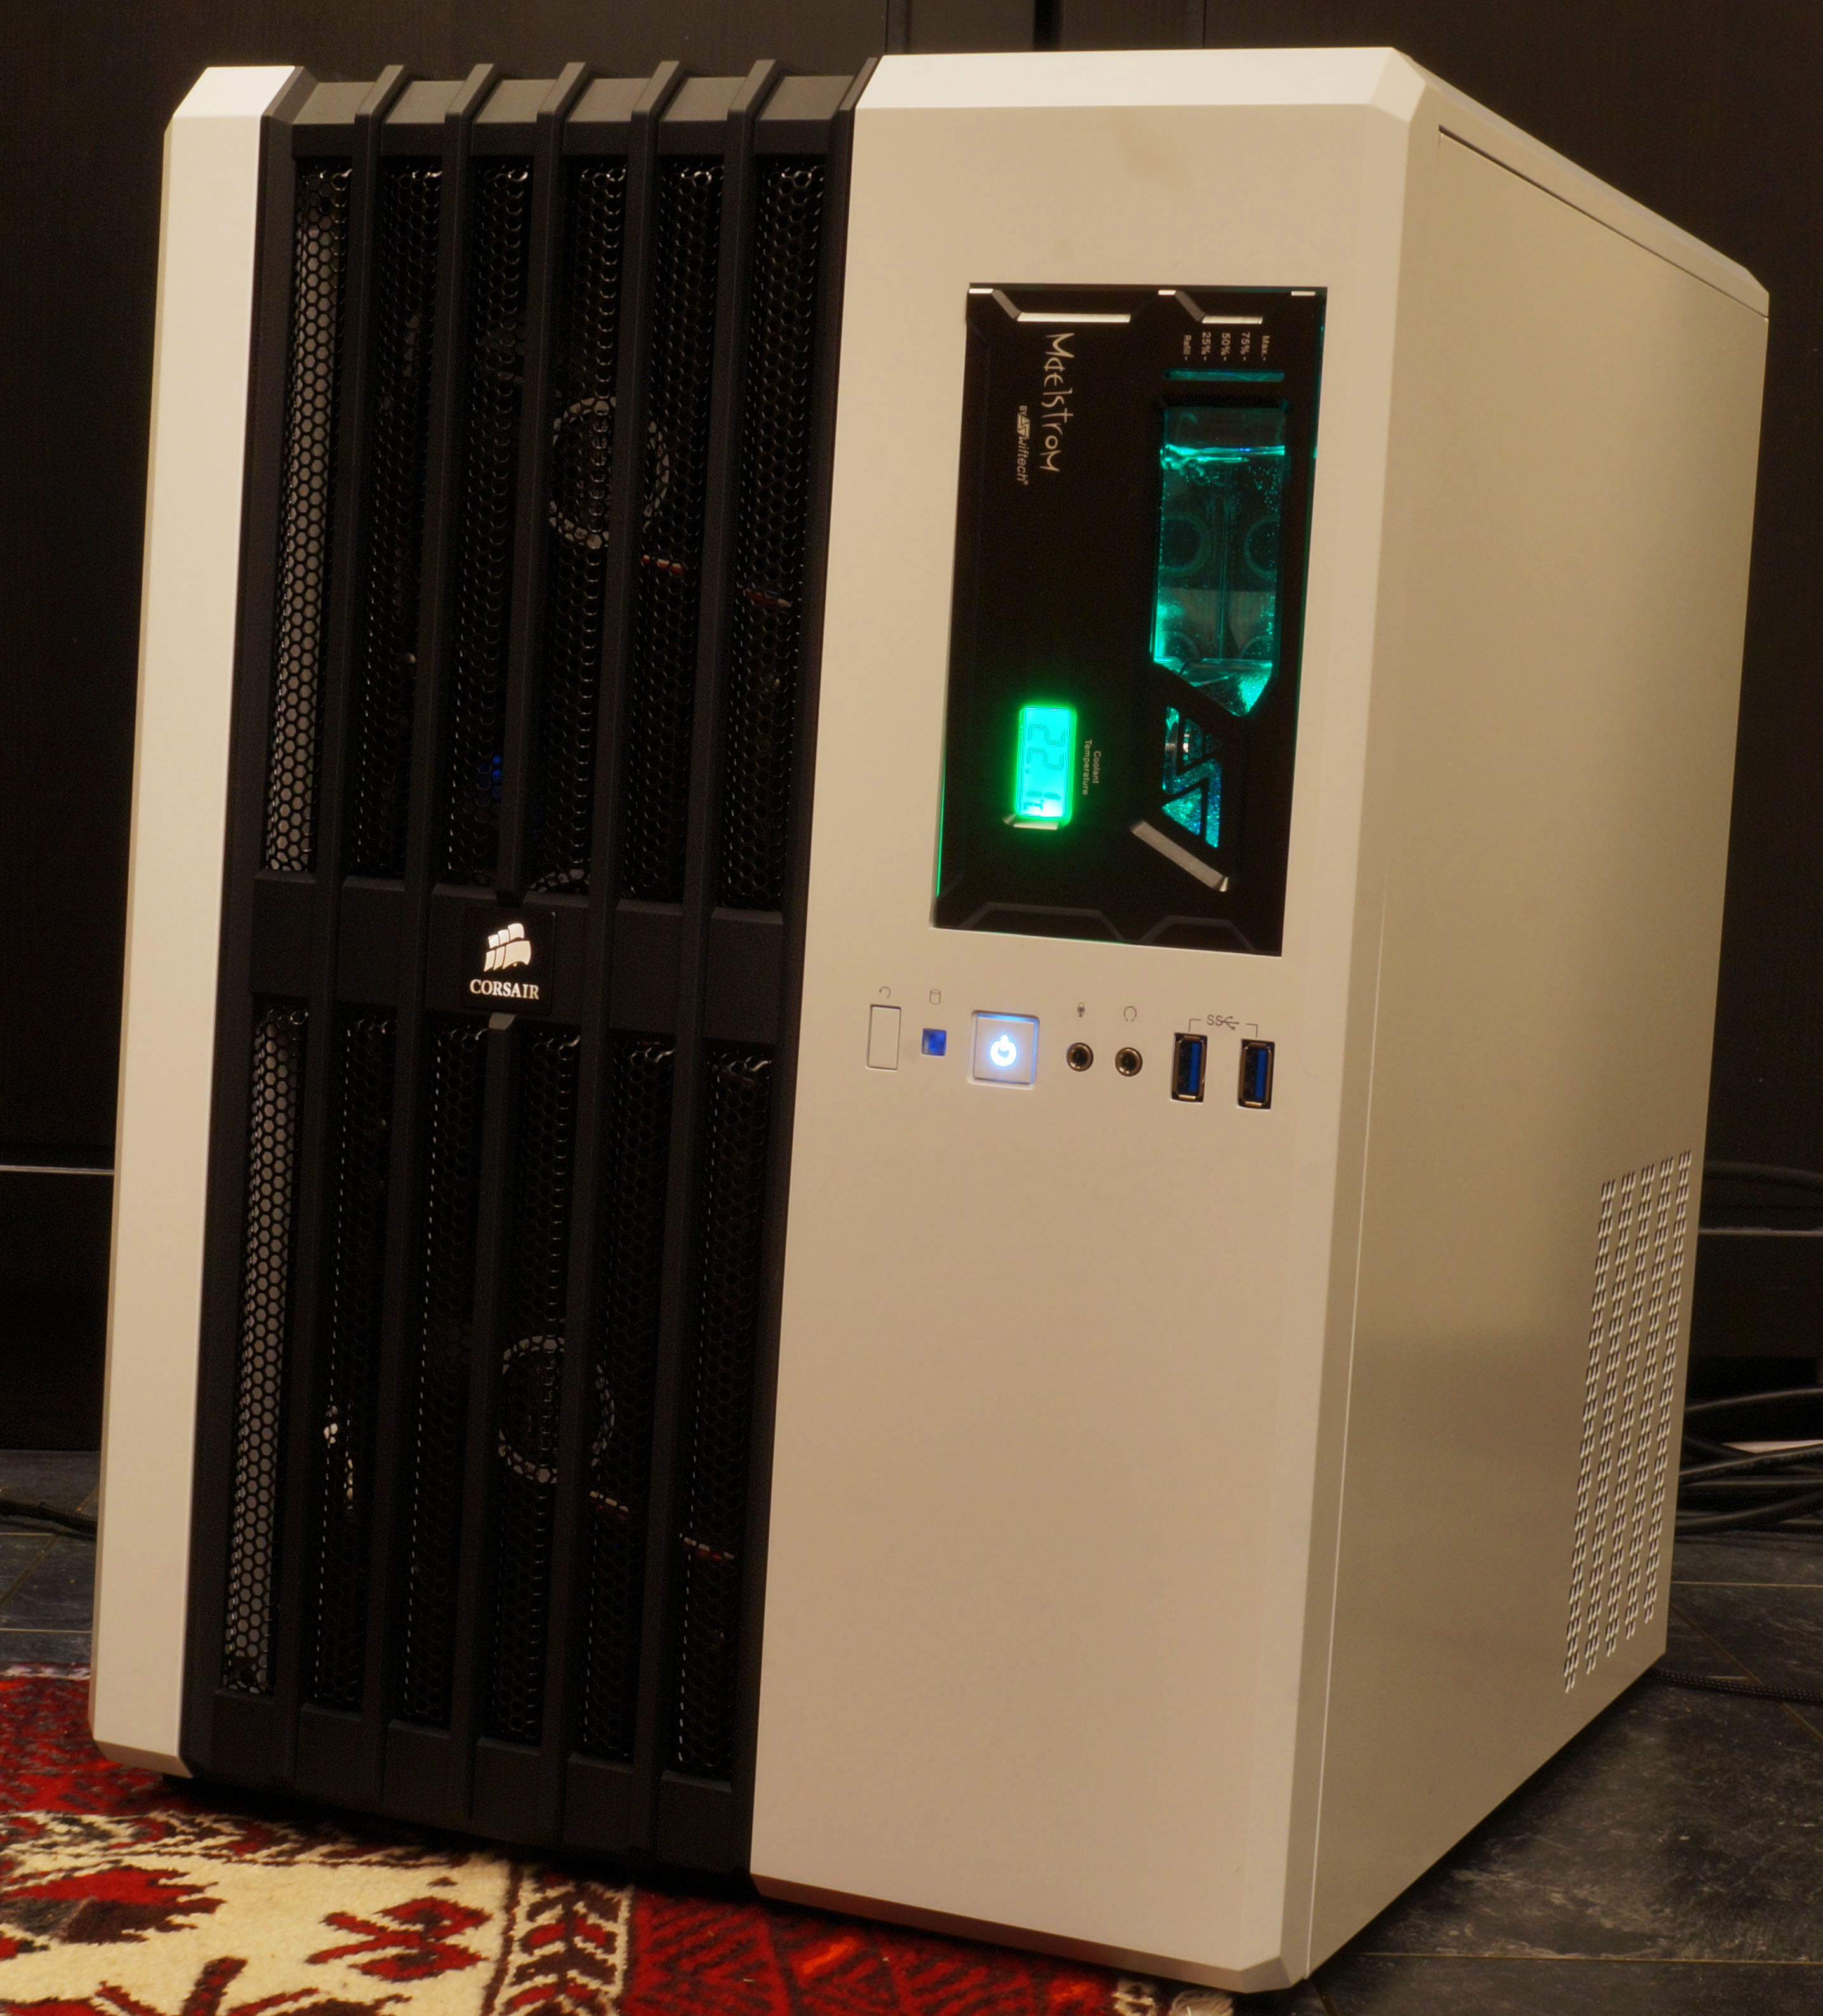
This is the pump and reservoir combo, the Maelstrom 5 1/4.” It is completely silent if I connect it to my CPU fan header and control the speed with Asus Fan Xpert 3.
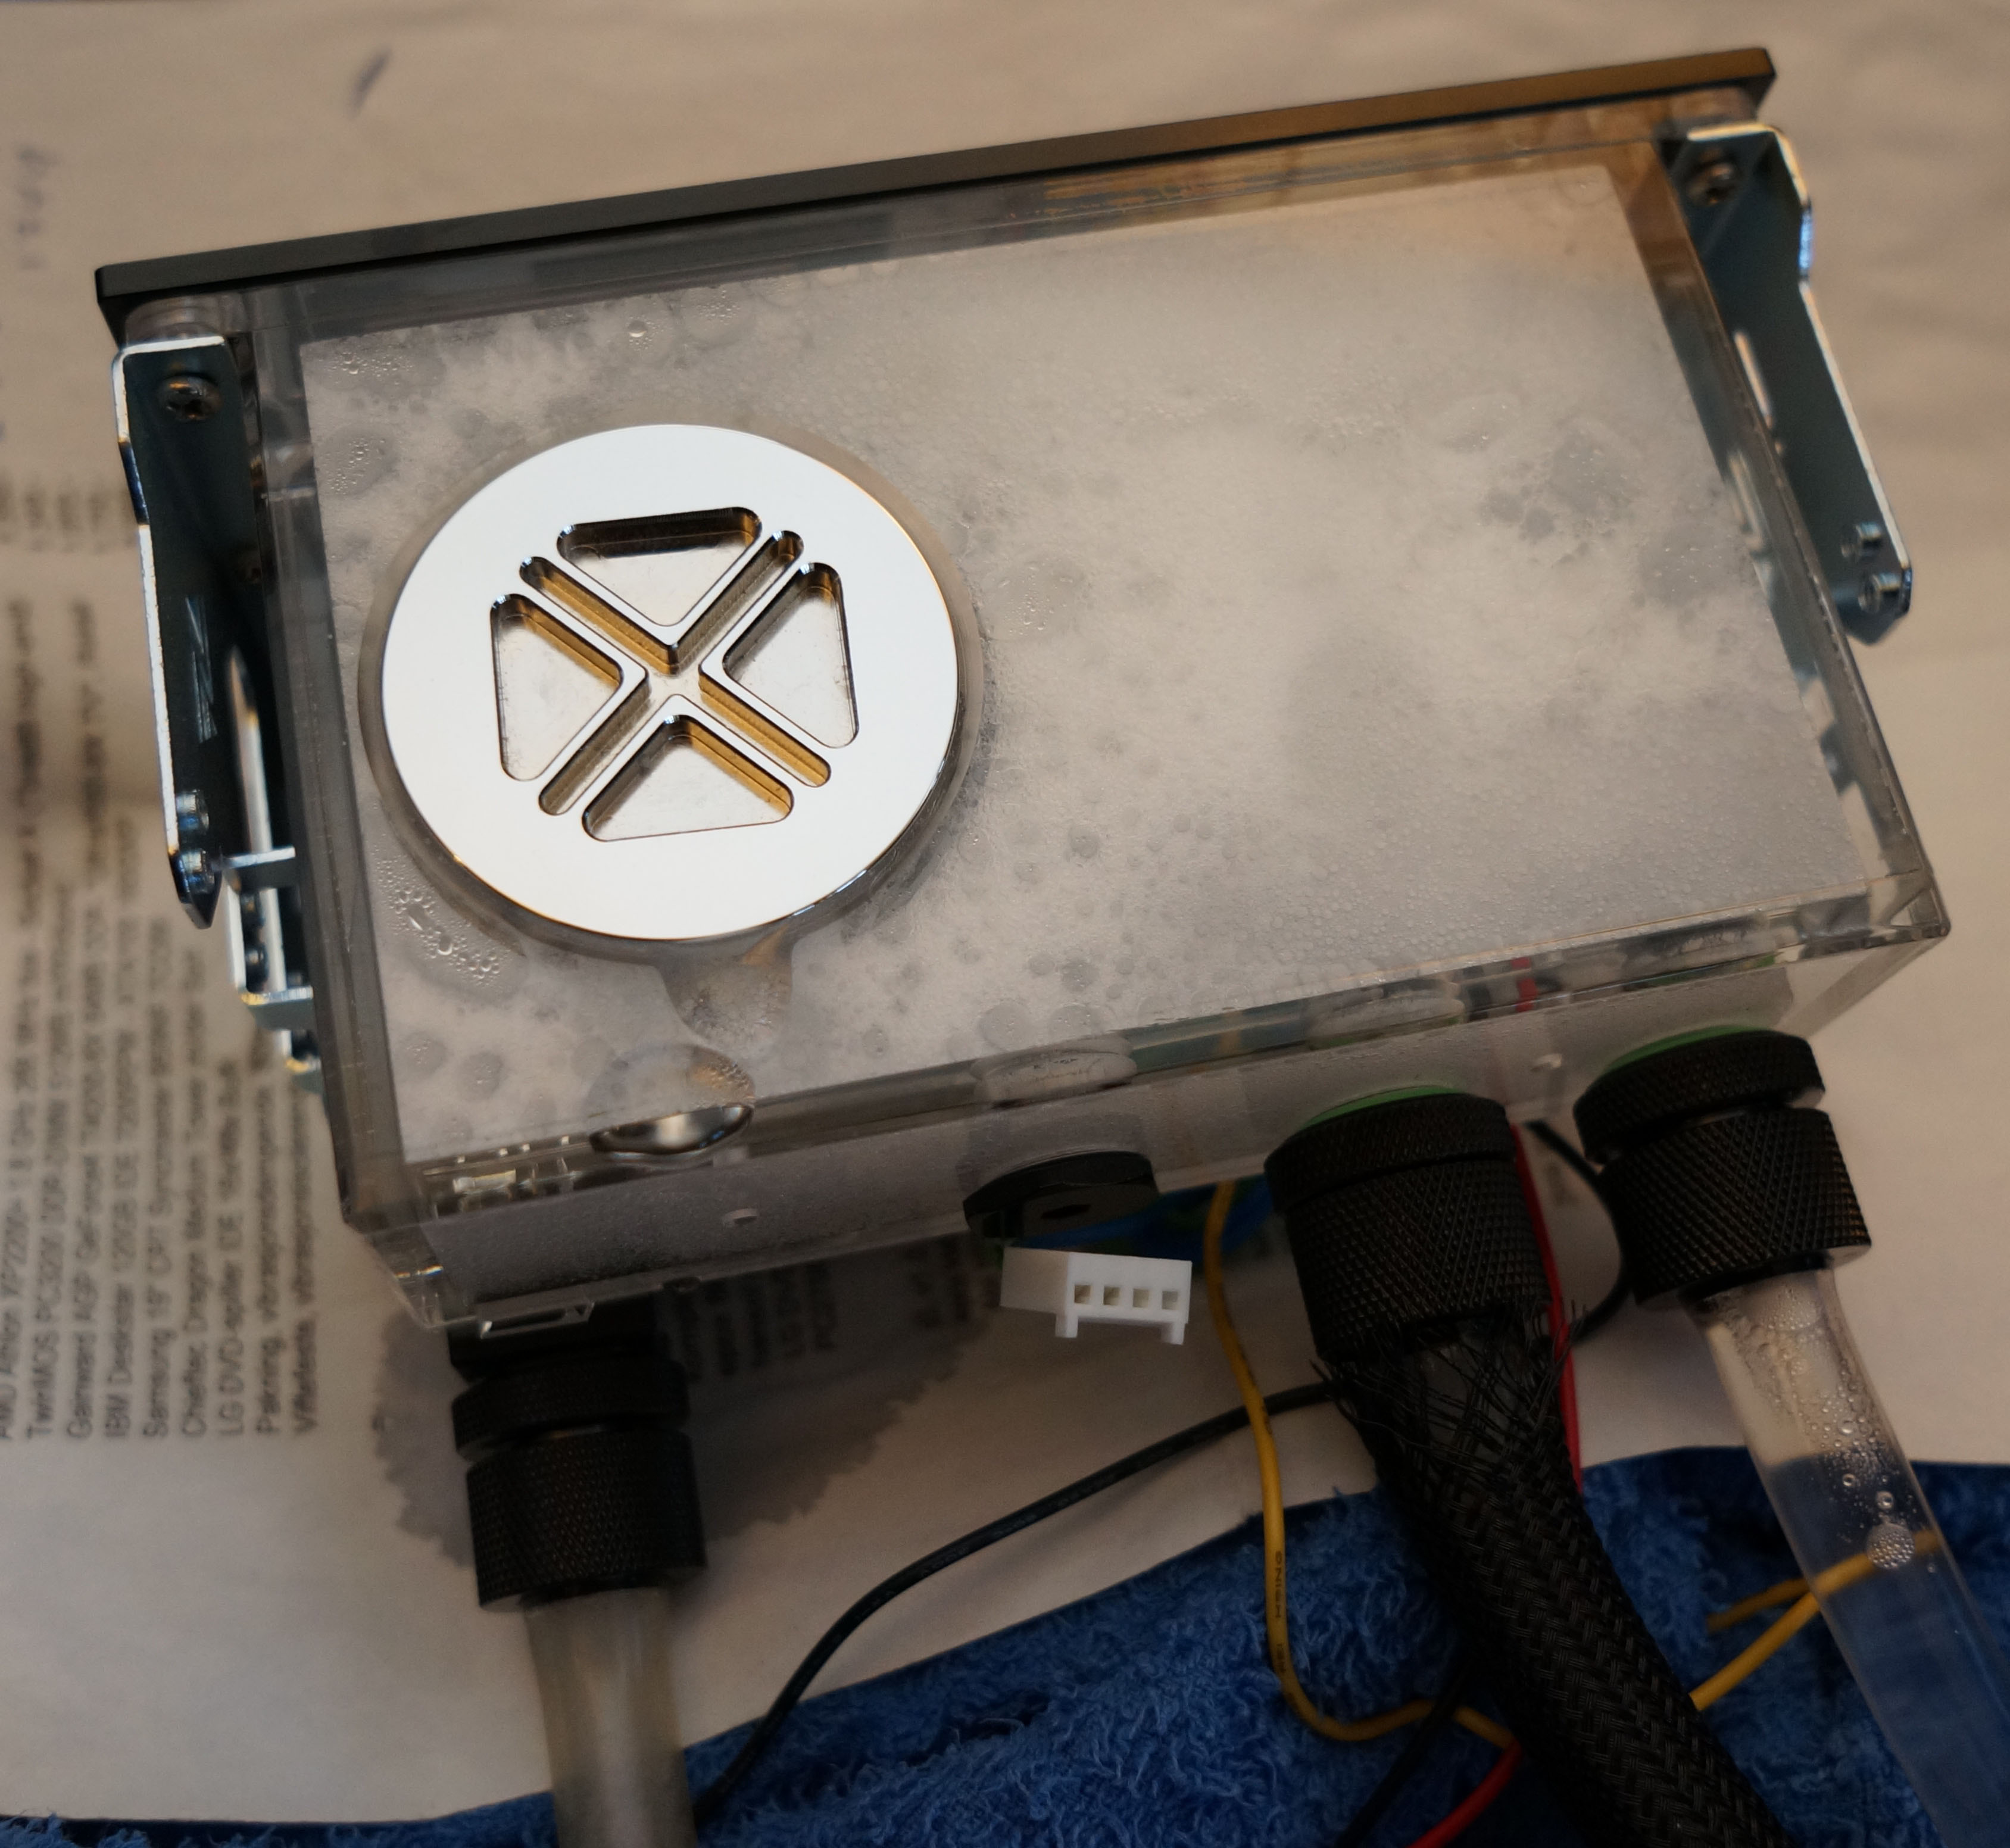
The 5.25″ drive bays are aligned vertically in the case so I had to tape the fillport with duct tape to keep it from leaking. You can see the fillport here leaking alittle.
Installed vertically and six months later it still haven’t leaked a drop as far as I’ve seen.

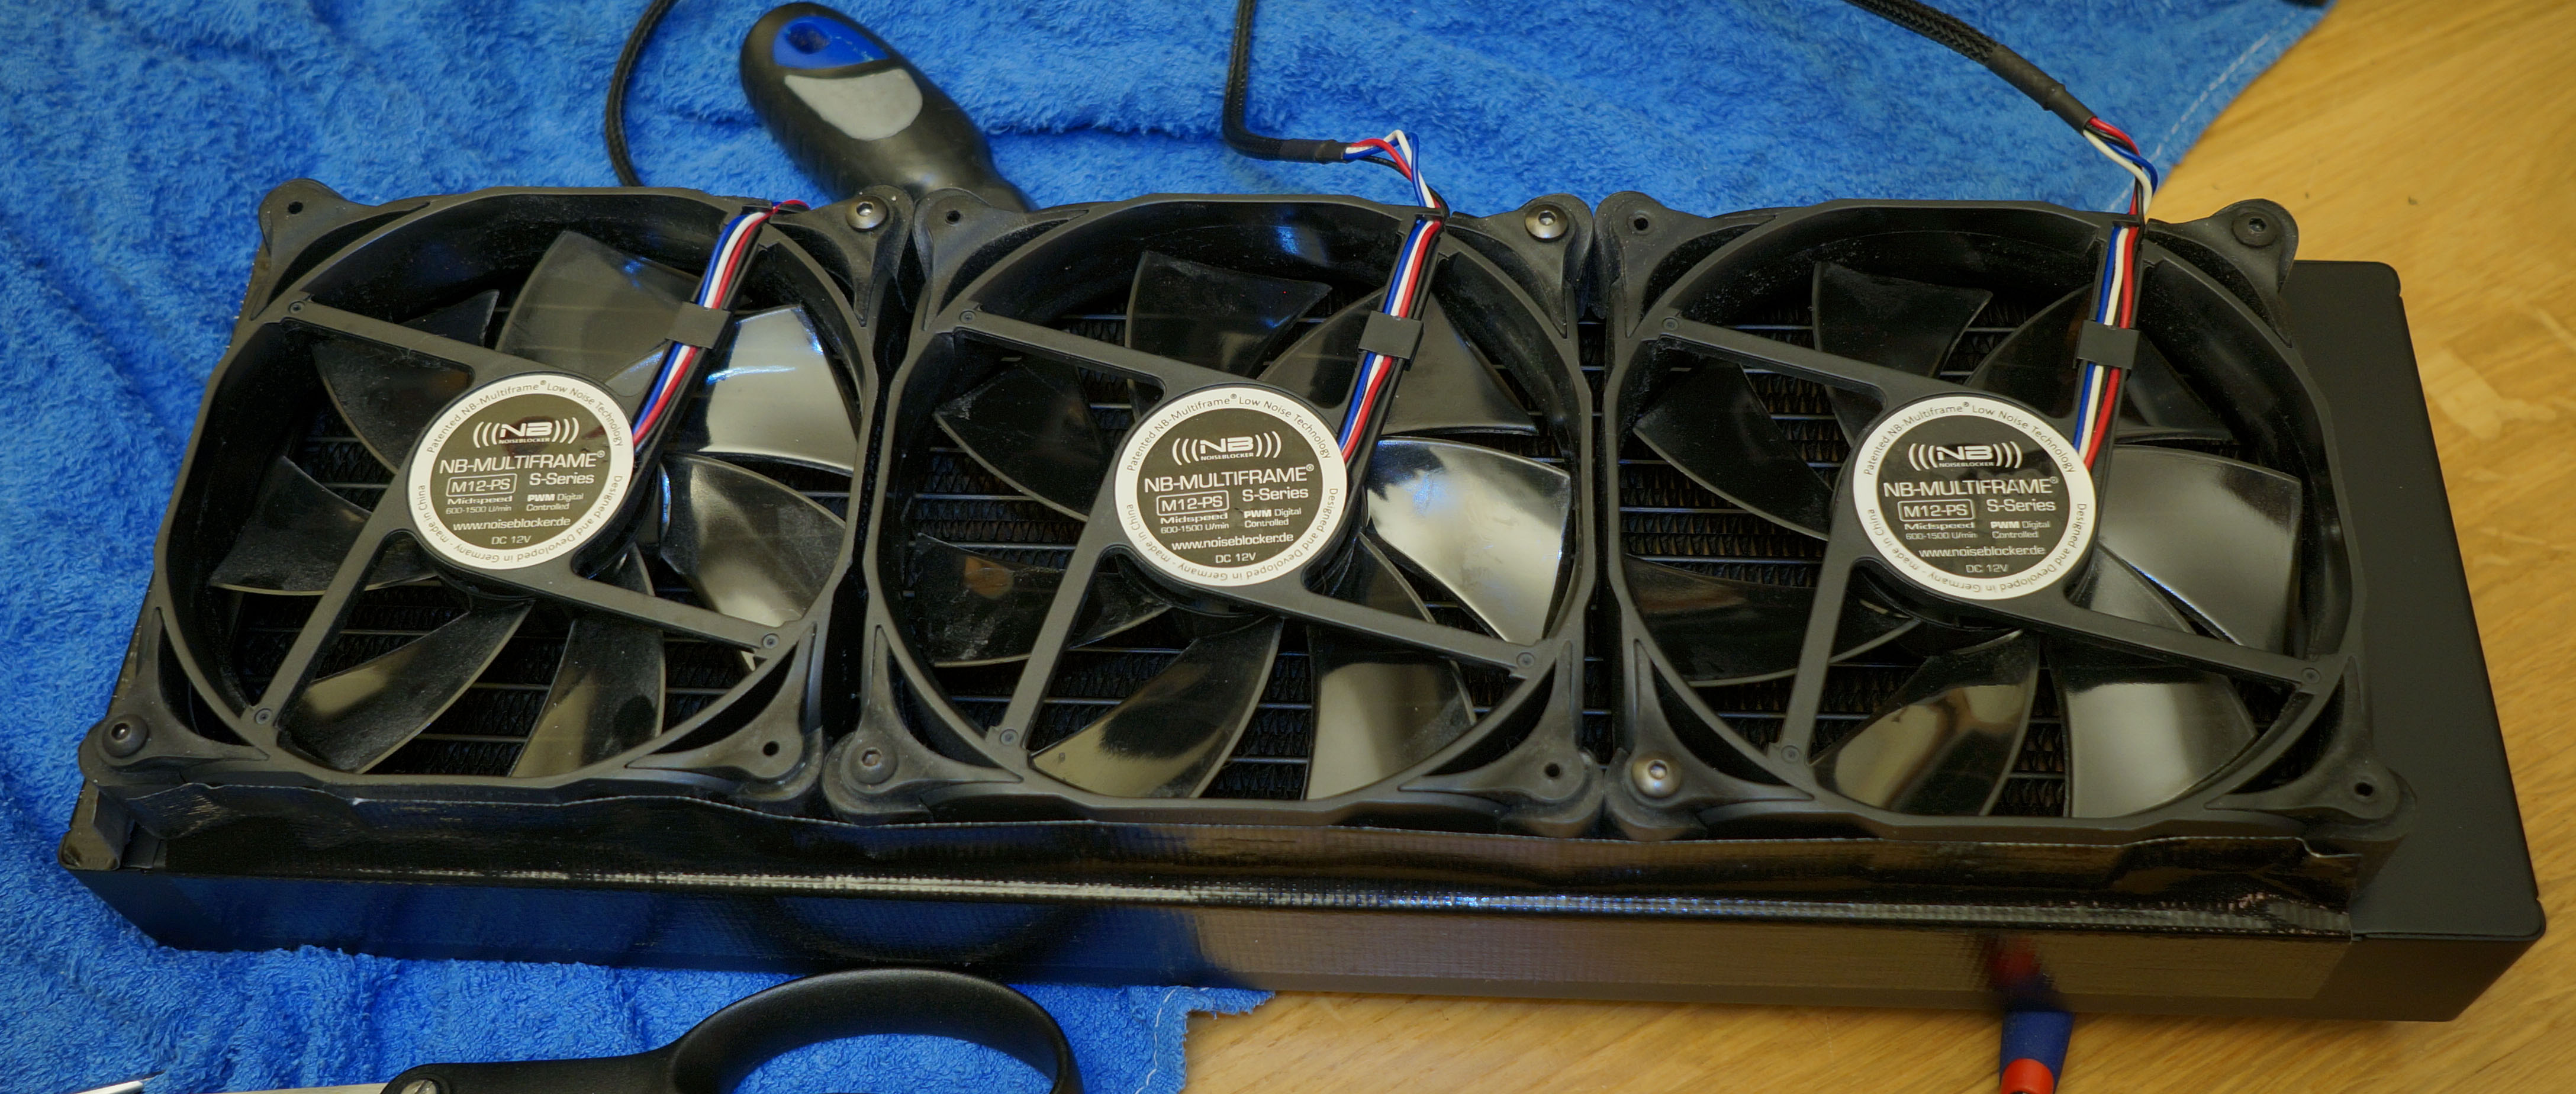
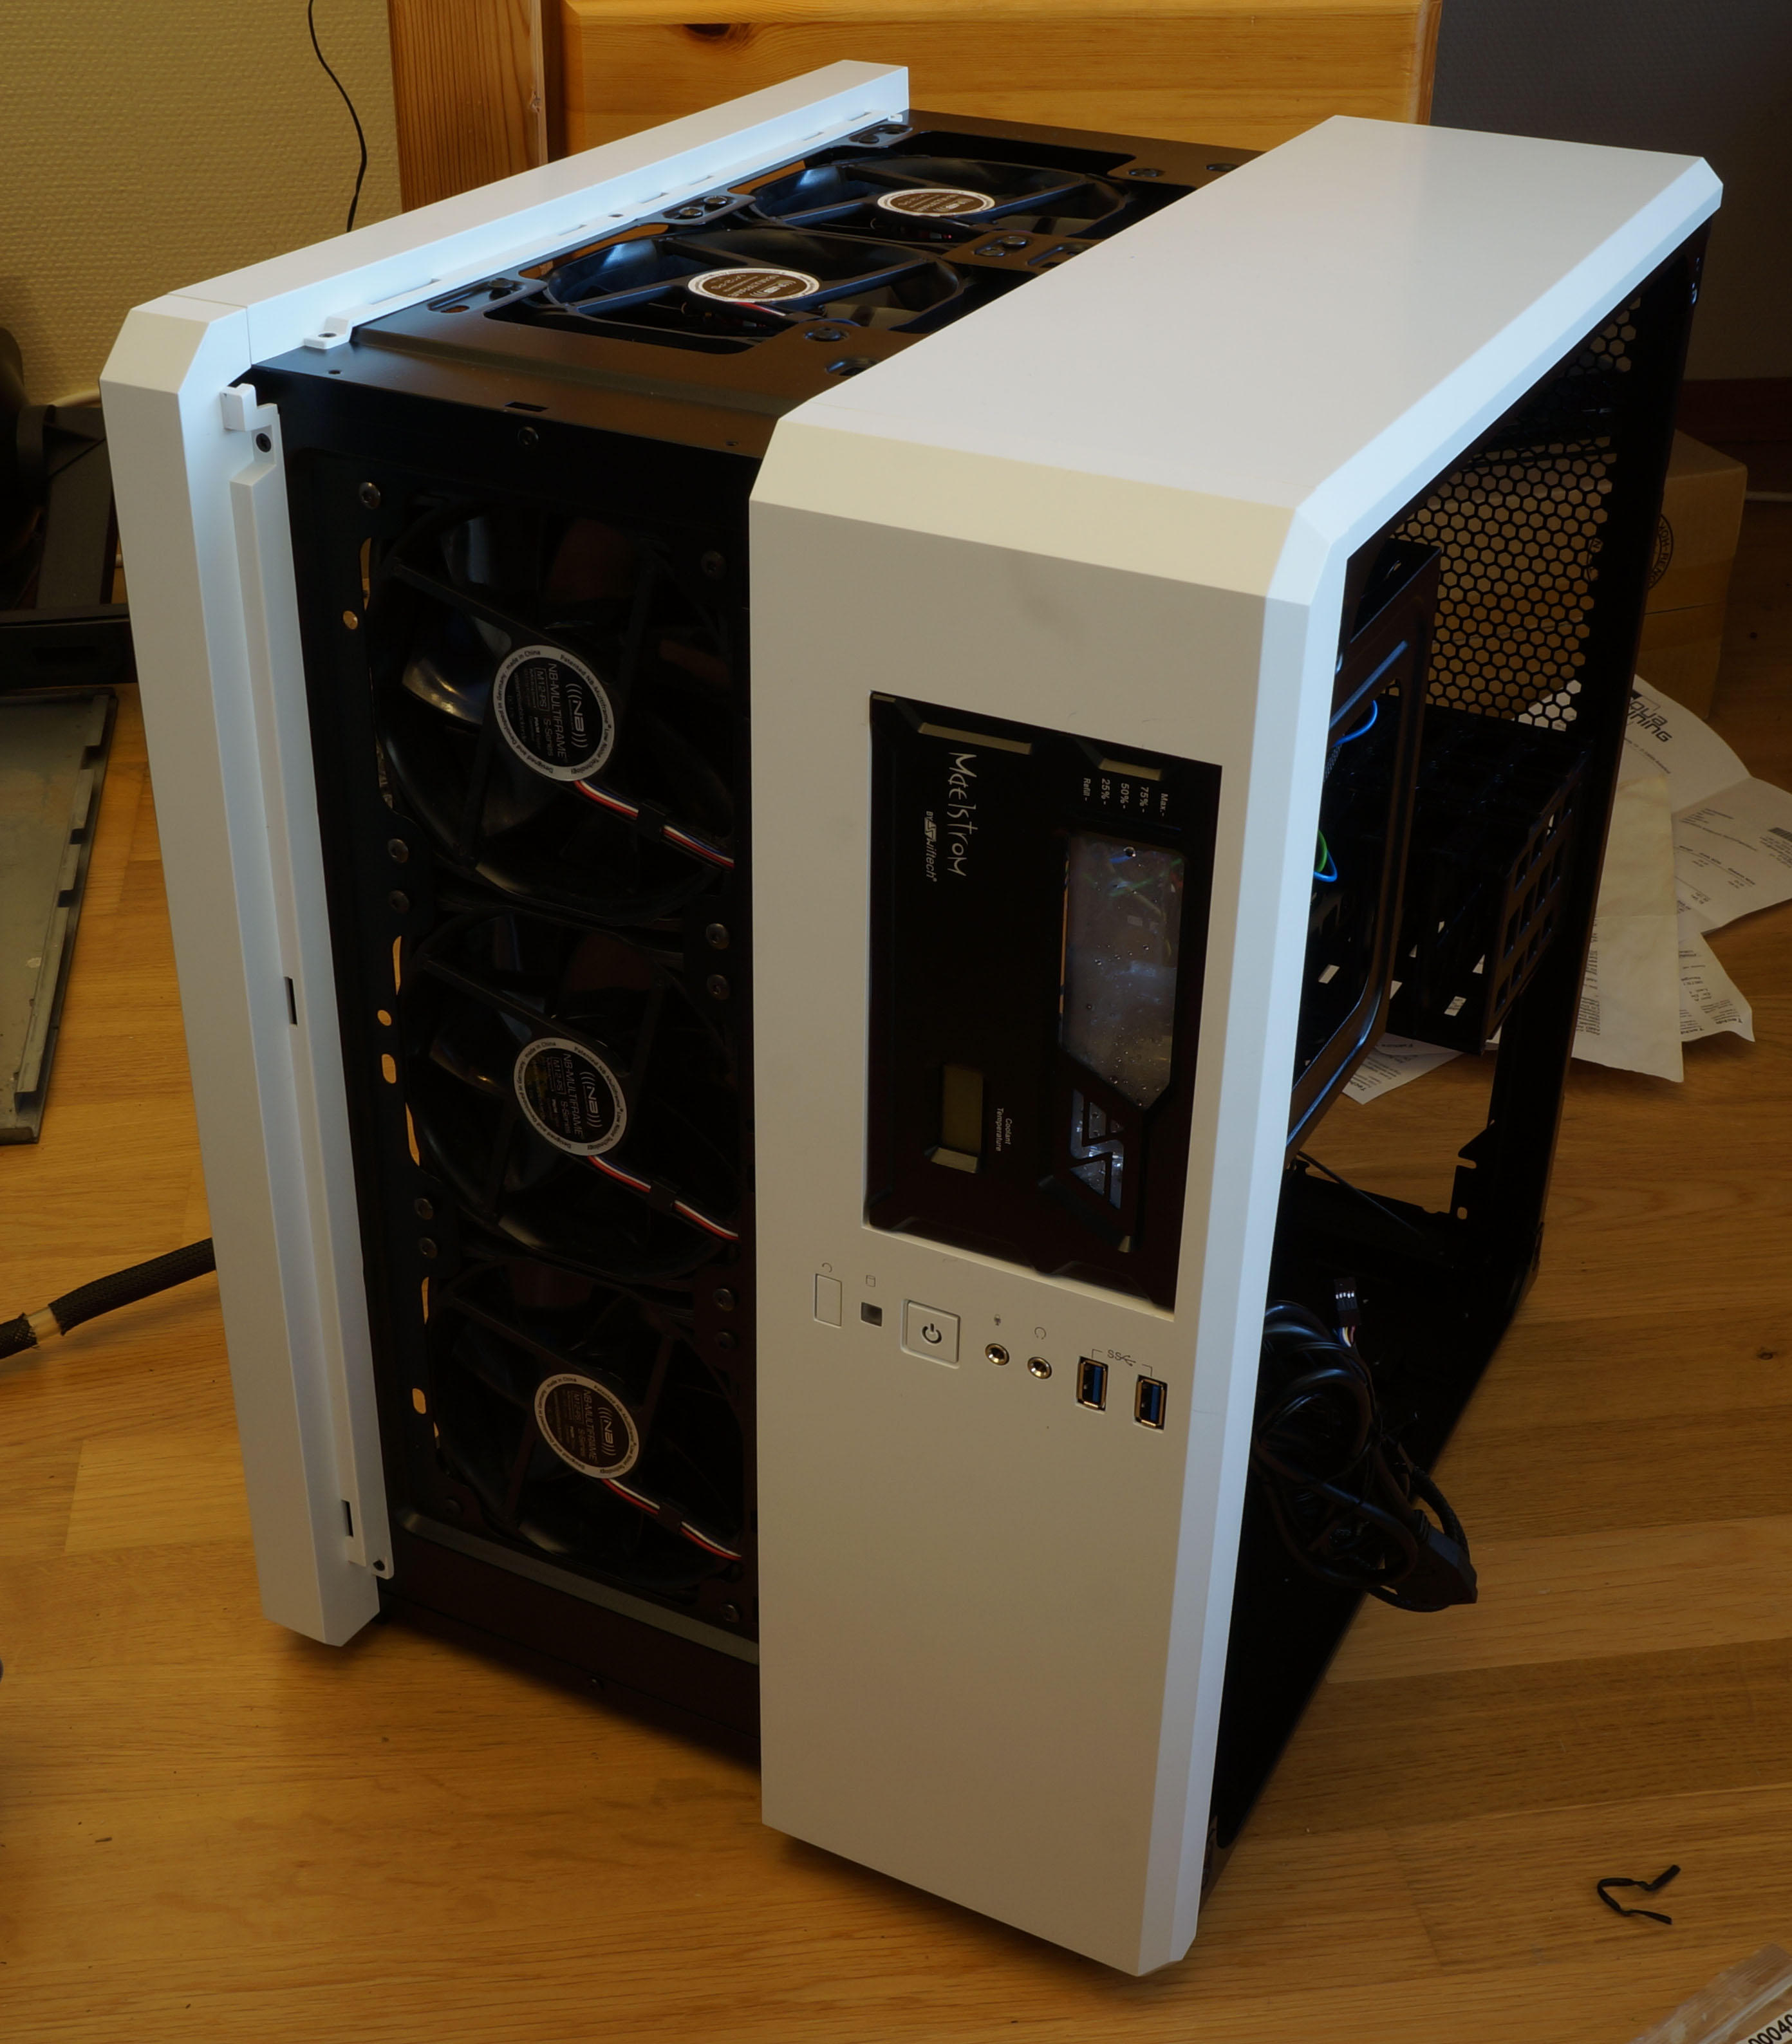
I also used duct tape on the radiators. That sealed the area between the fans and radiator. It doesn’t look too bad with black duct tape.
All done
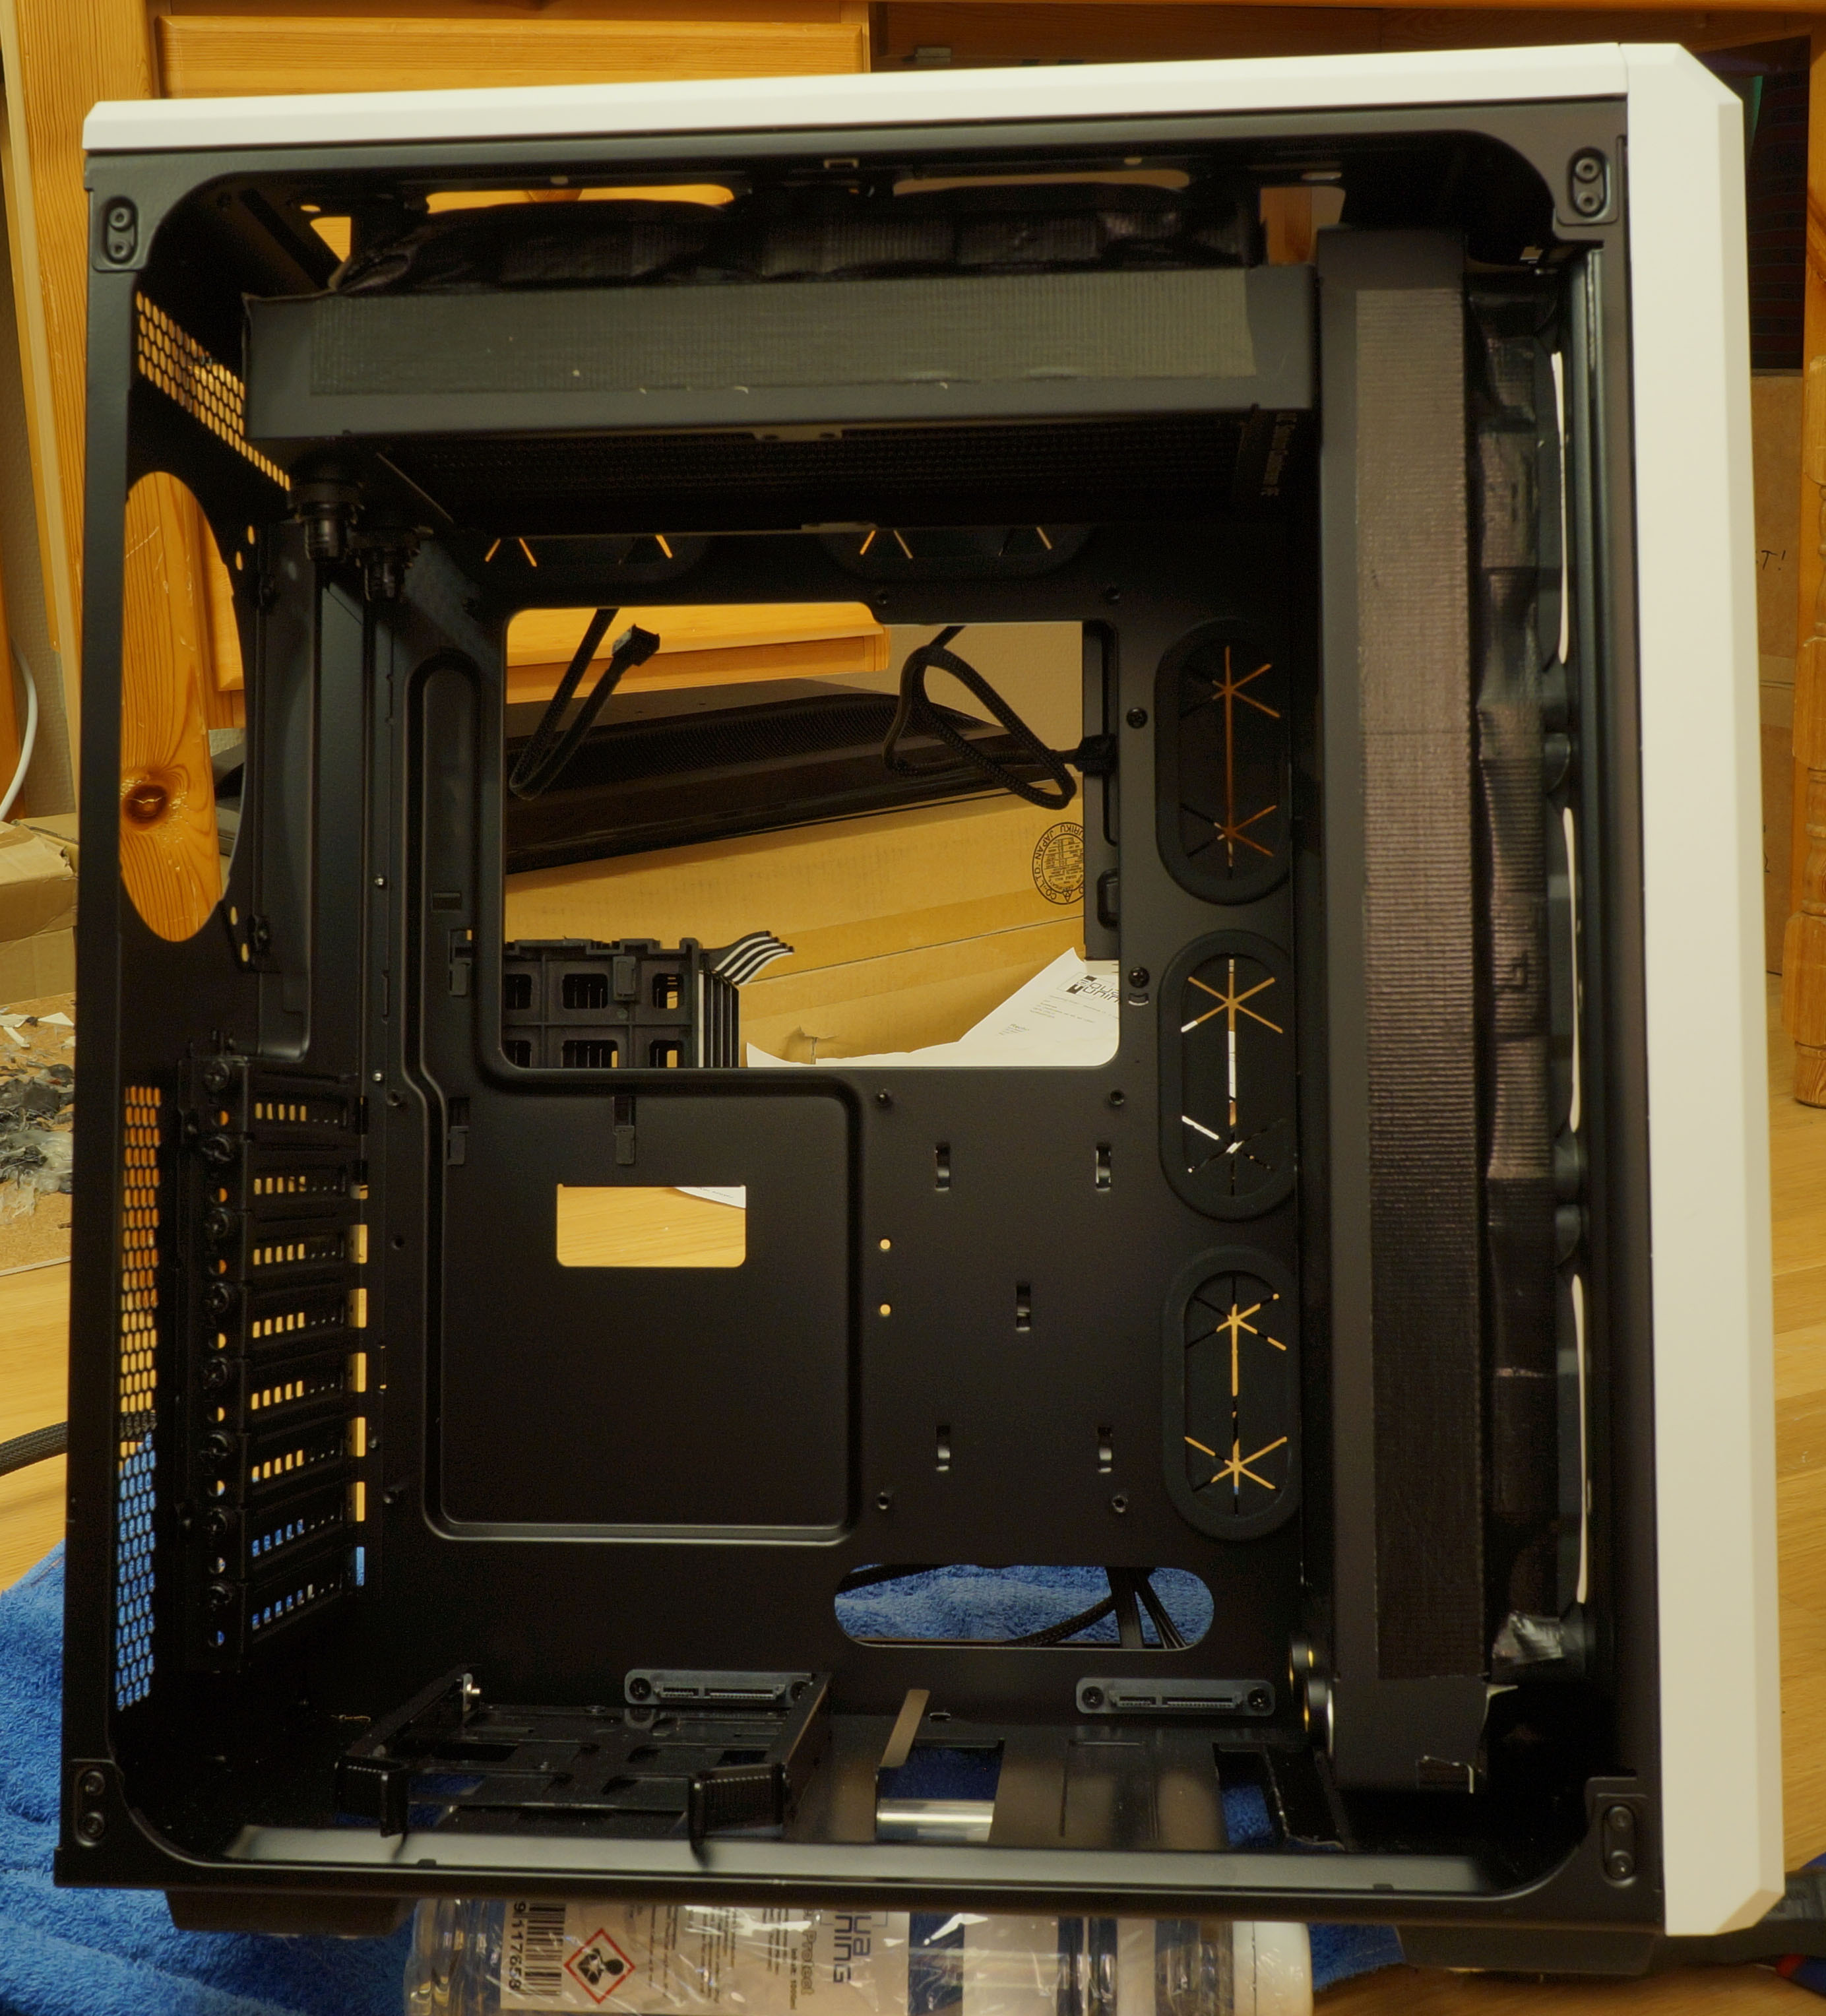
And both radiators installed. It was a tight fit but they got in.

I had to bend one of the HDD drive trays.
Another angle
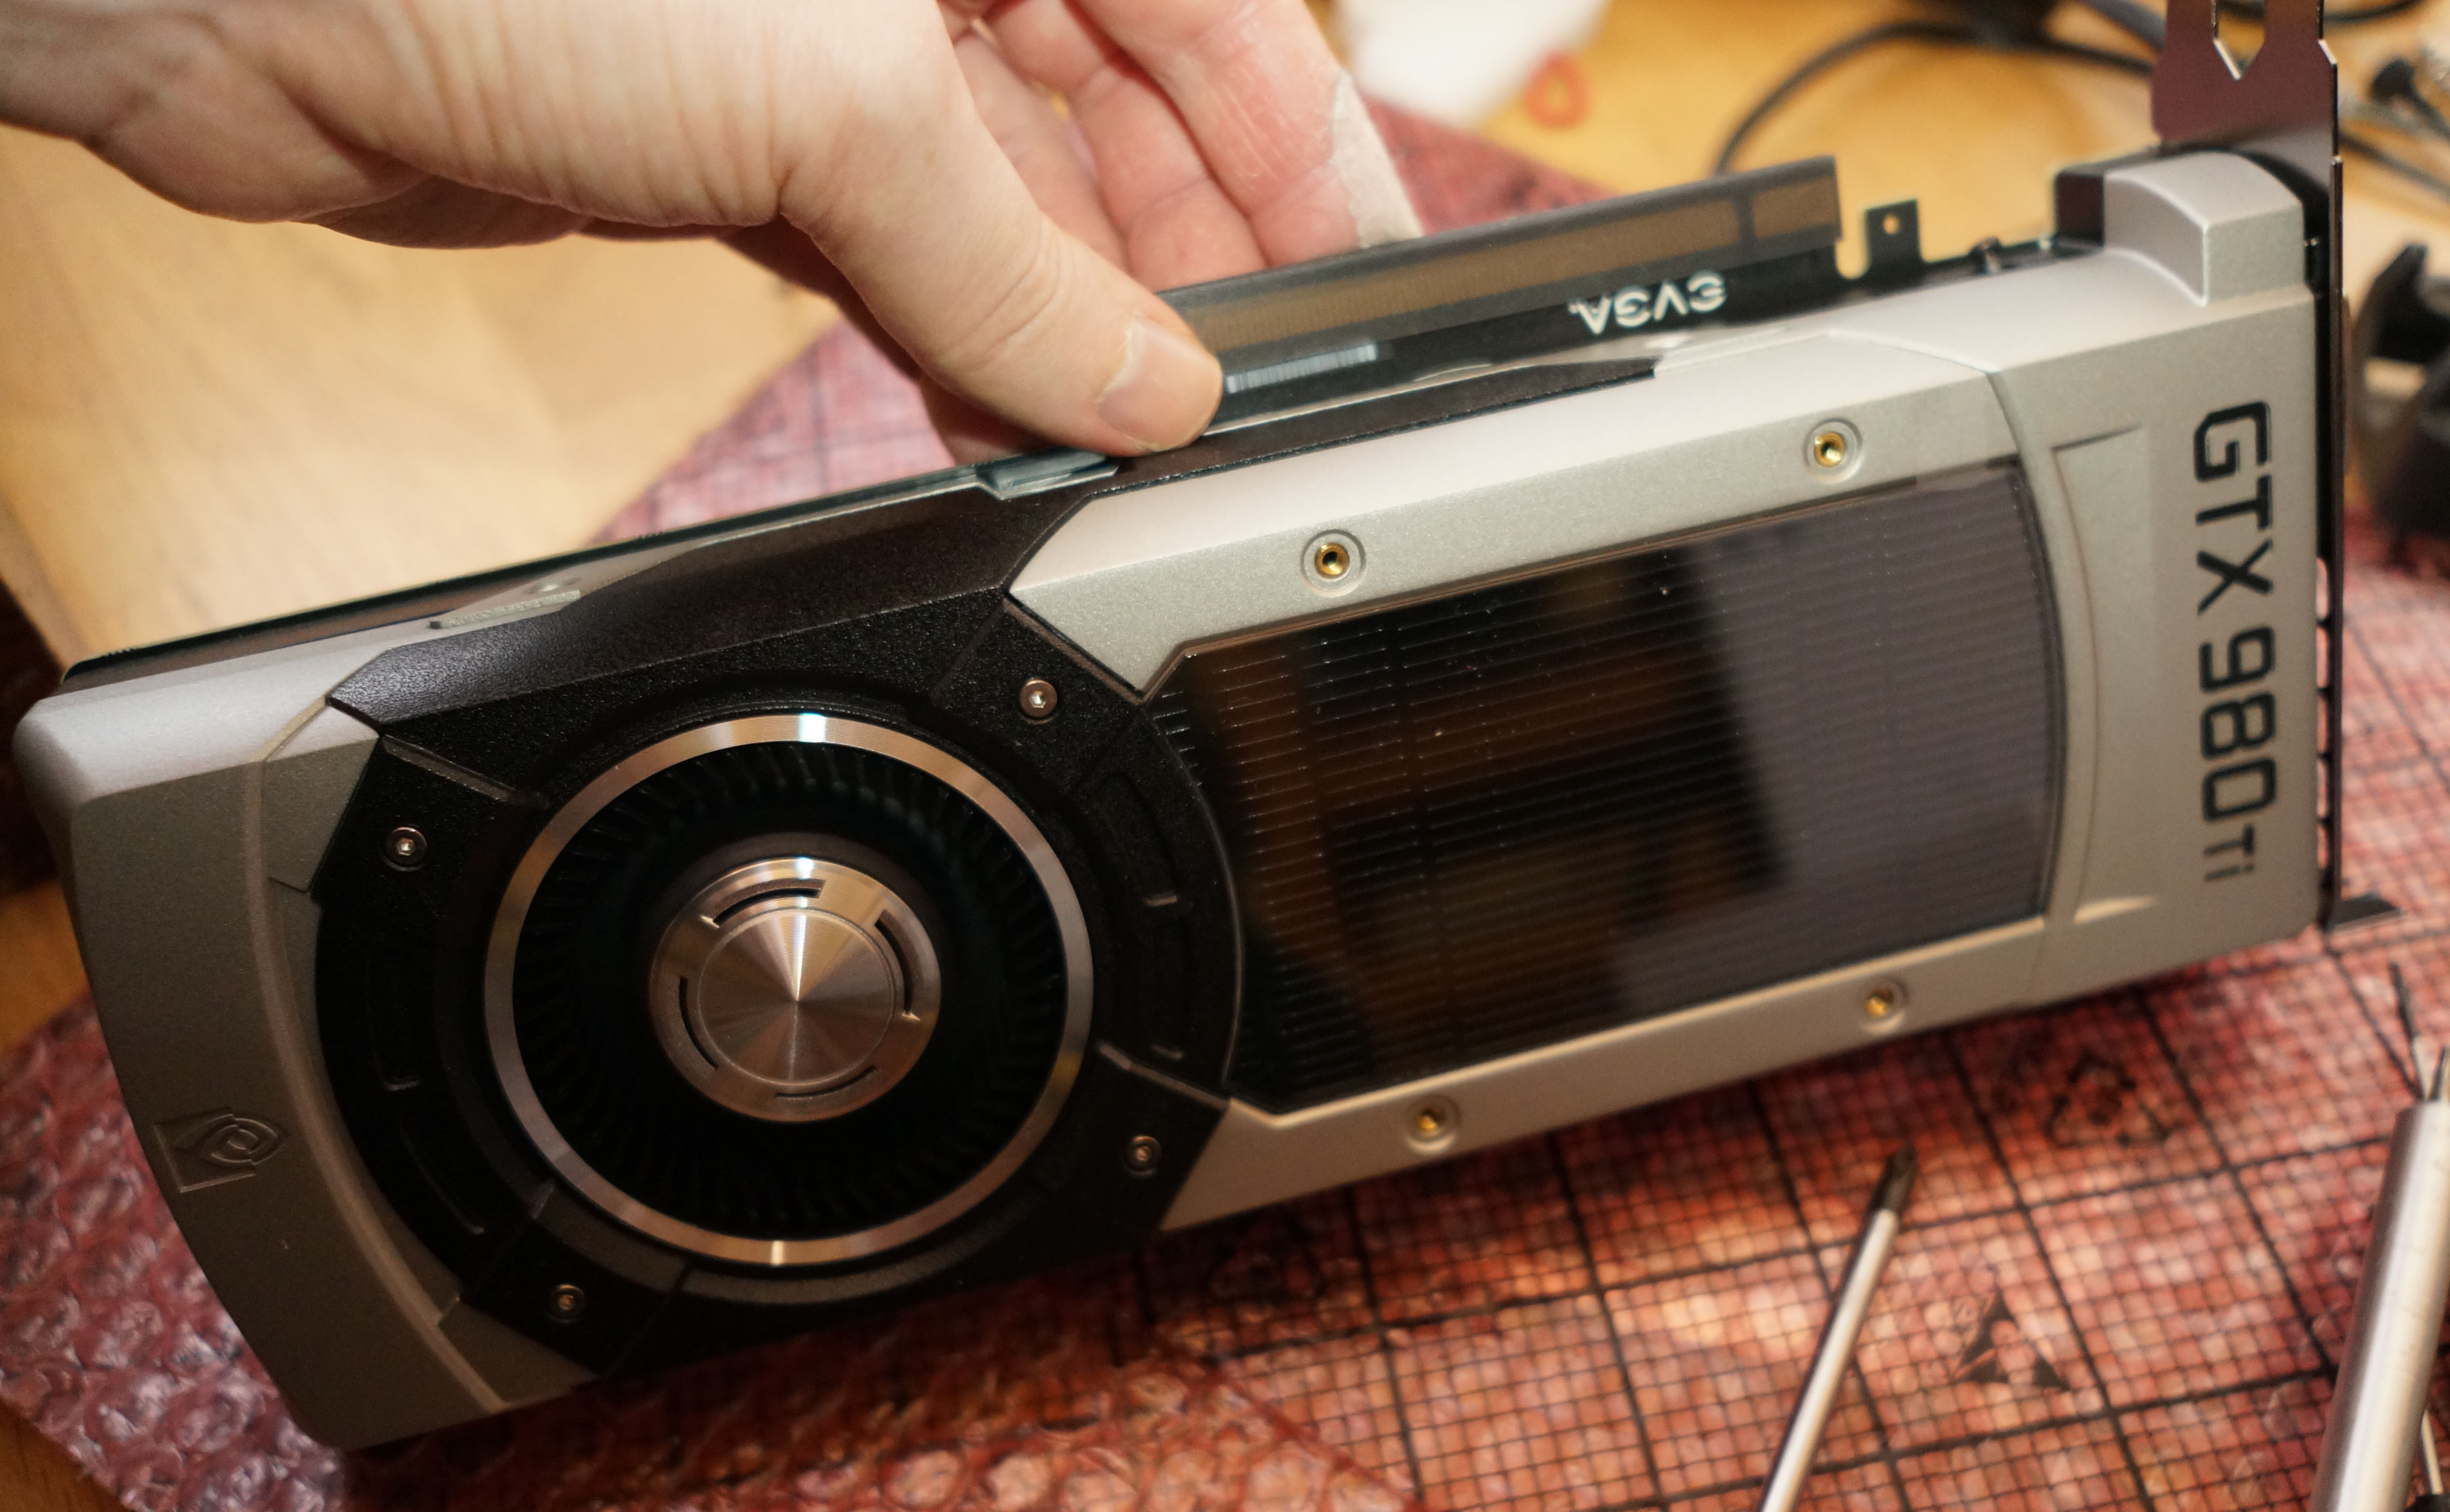
The GeForce GTX 980 Ti. I removed the GPU heatsink and watercooled it and let the original board heatsink intacts and let it cool the memory and voltage regulator modules. Cheaper so I don’t have to buy a new full size GPU block with each new GPU I buy.

XSPC inline water temperature sensors. One before the GPU and CPU blocks, and one after. Connects straight to the Asus Rampage V Extreme motherboard.
The difference isn’t much only two degrees before waterblocks and after. Temperature 1 is water after watercooling blocks, Temperature 2 is water before blocks and Temperature 3 is air intake.
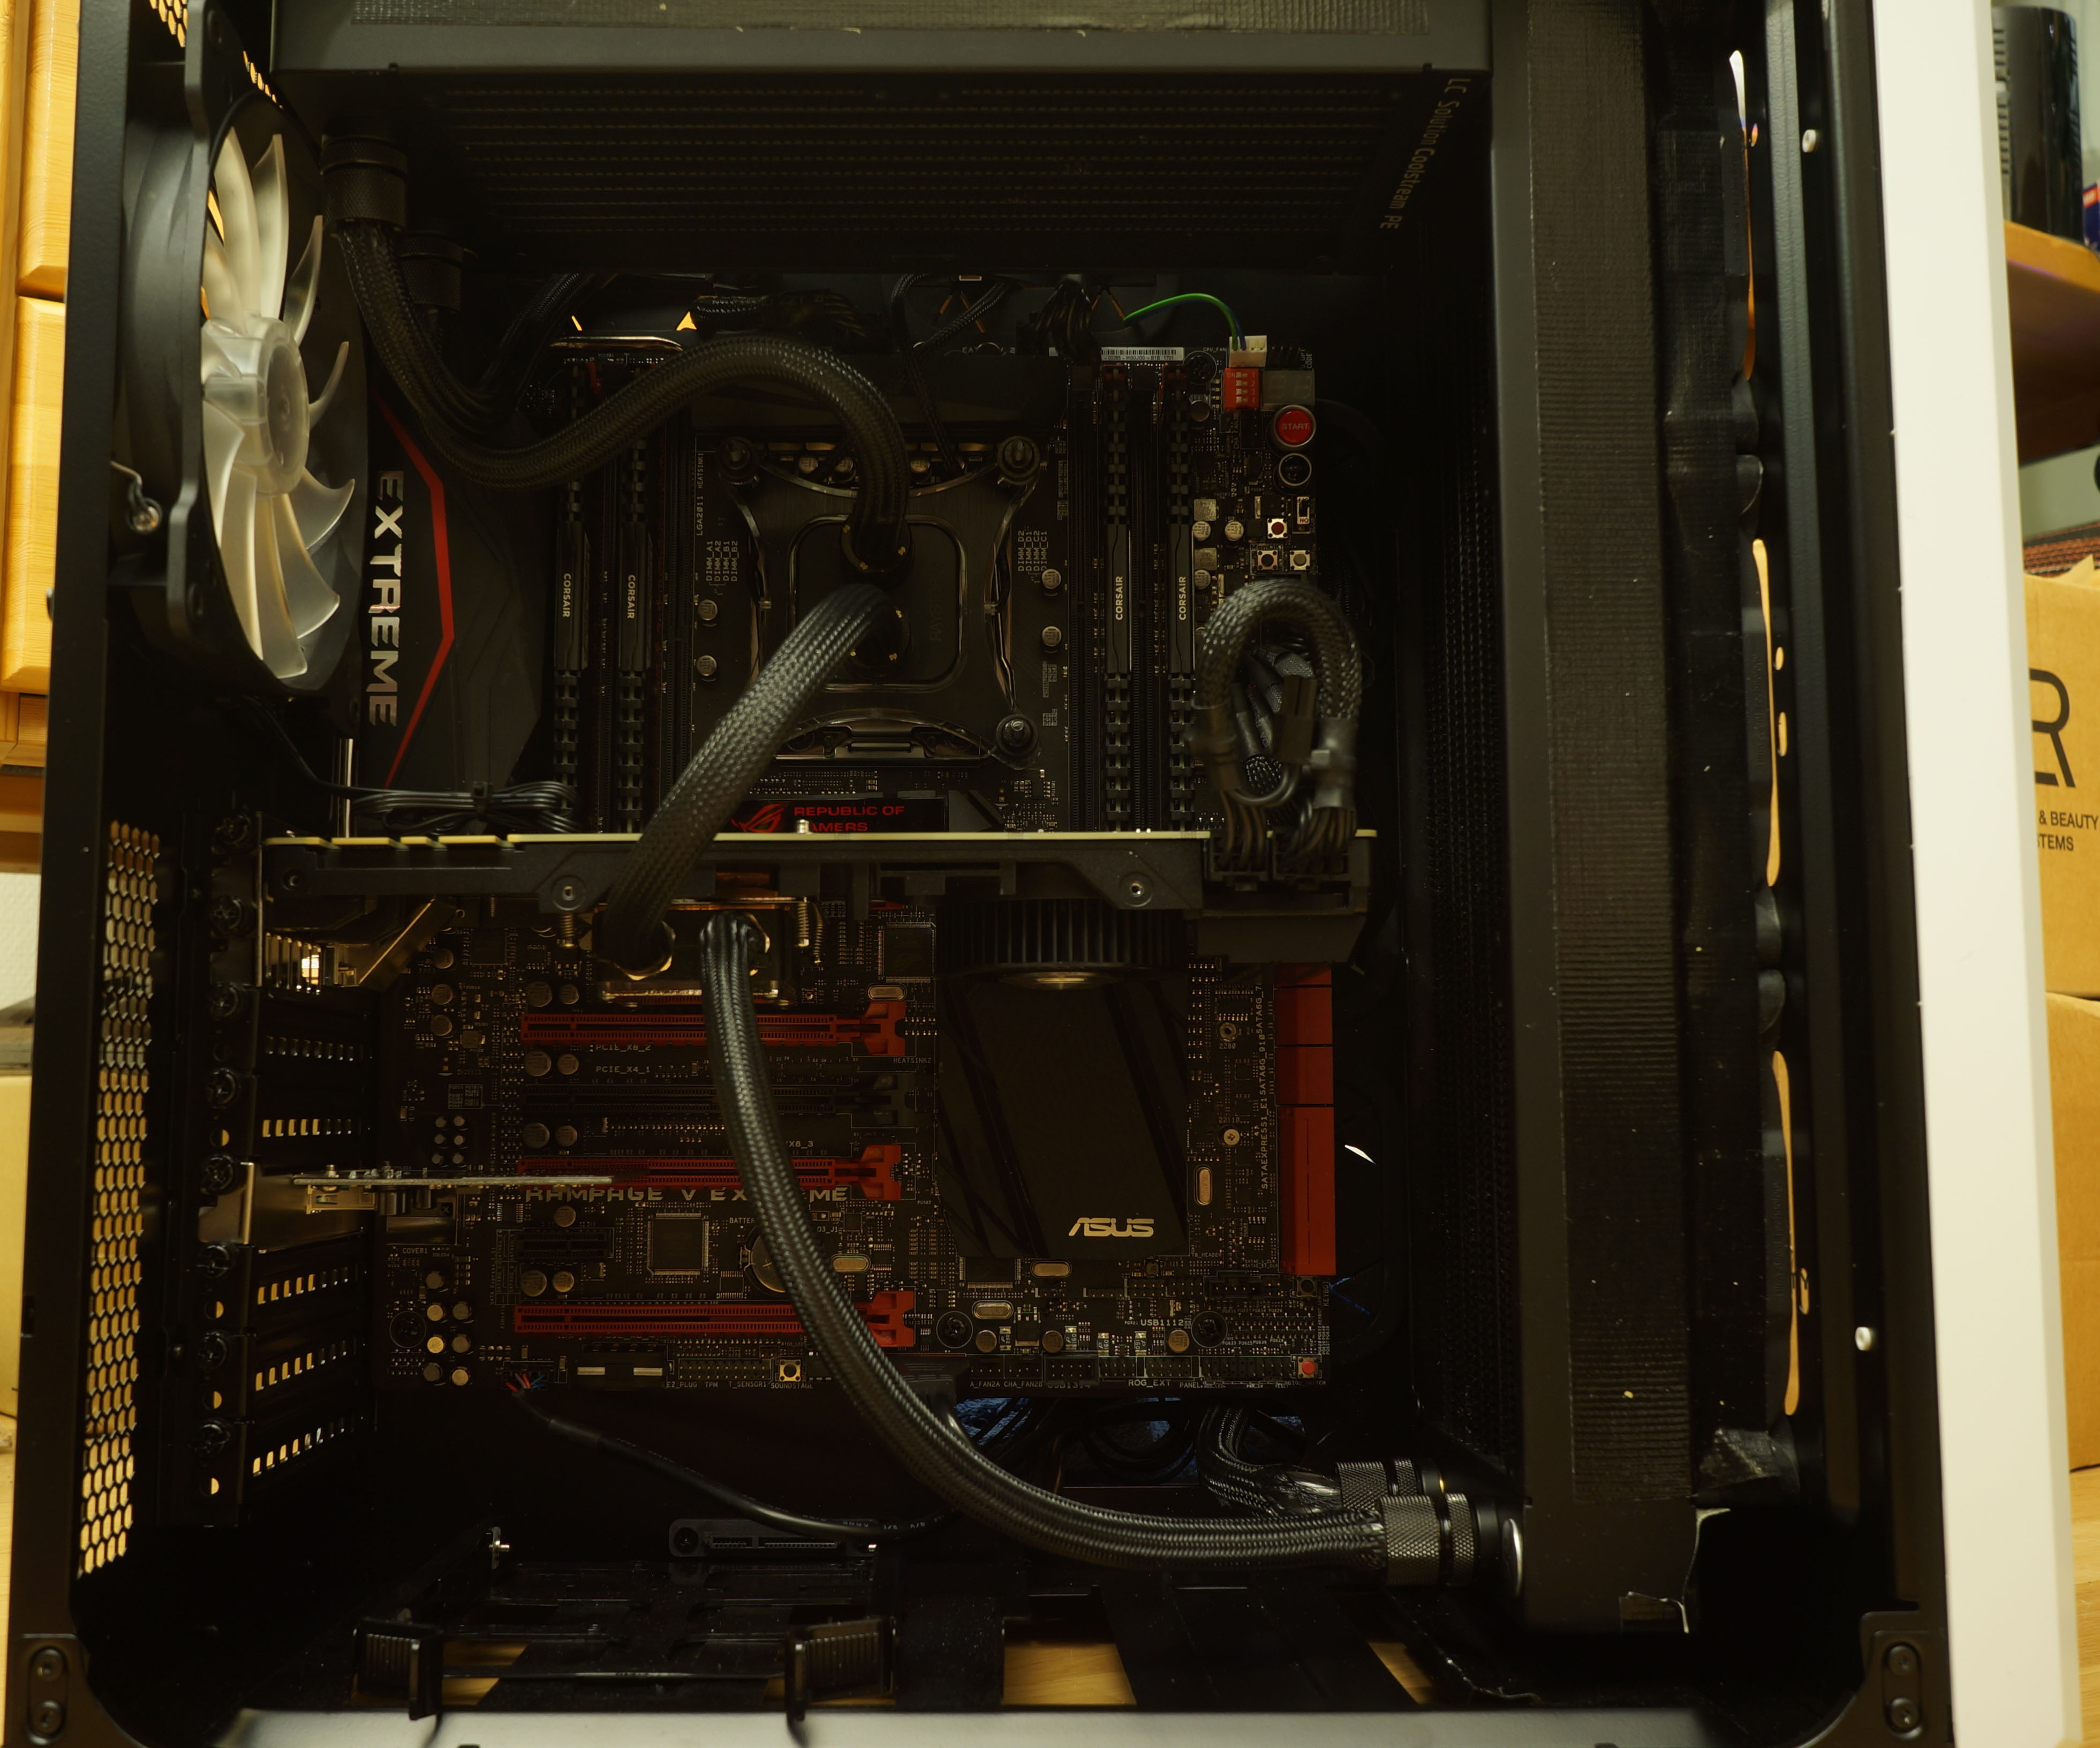
All done. I have used compression fittings and braided sleeving on the tube. Six months later and not a drop leaked.
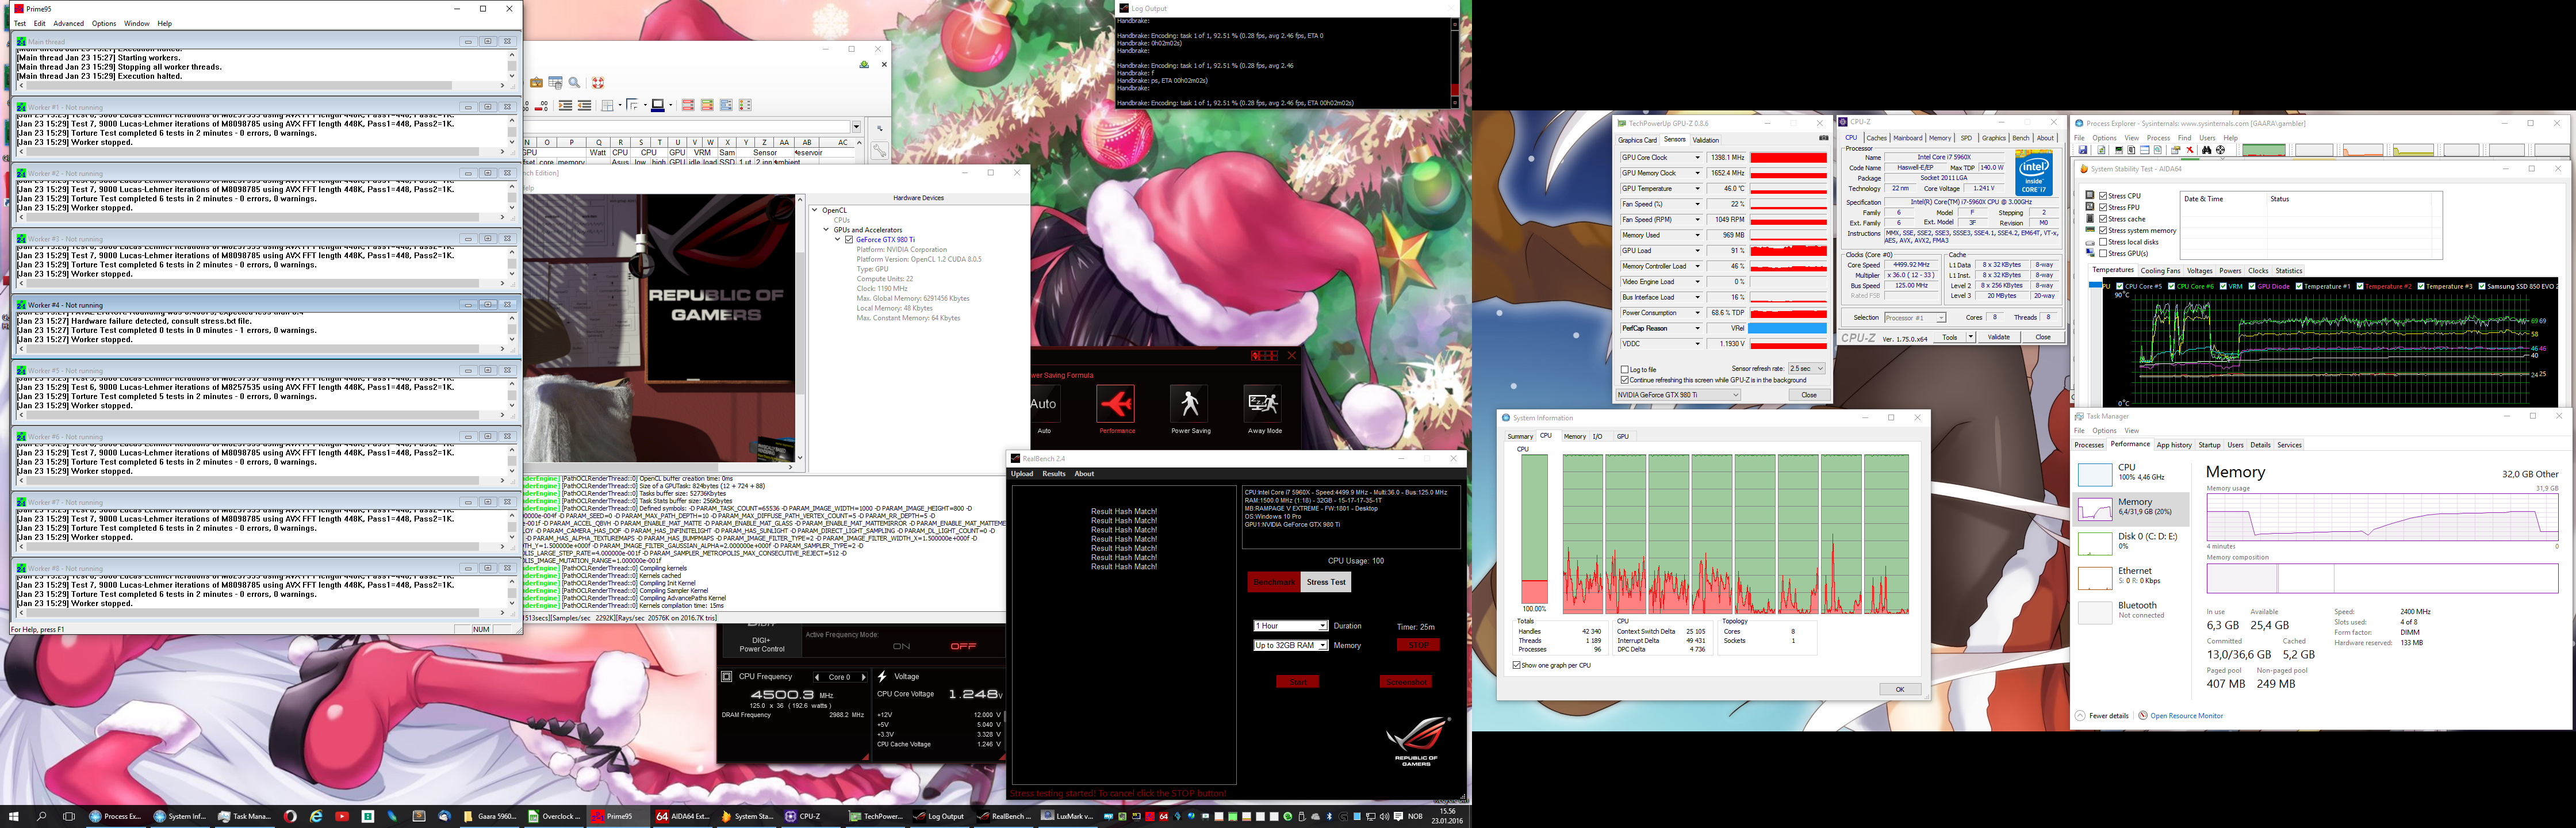
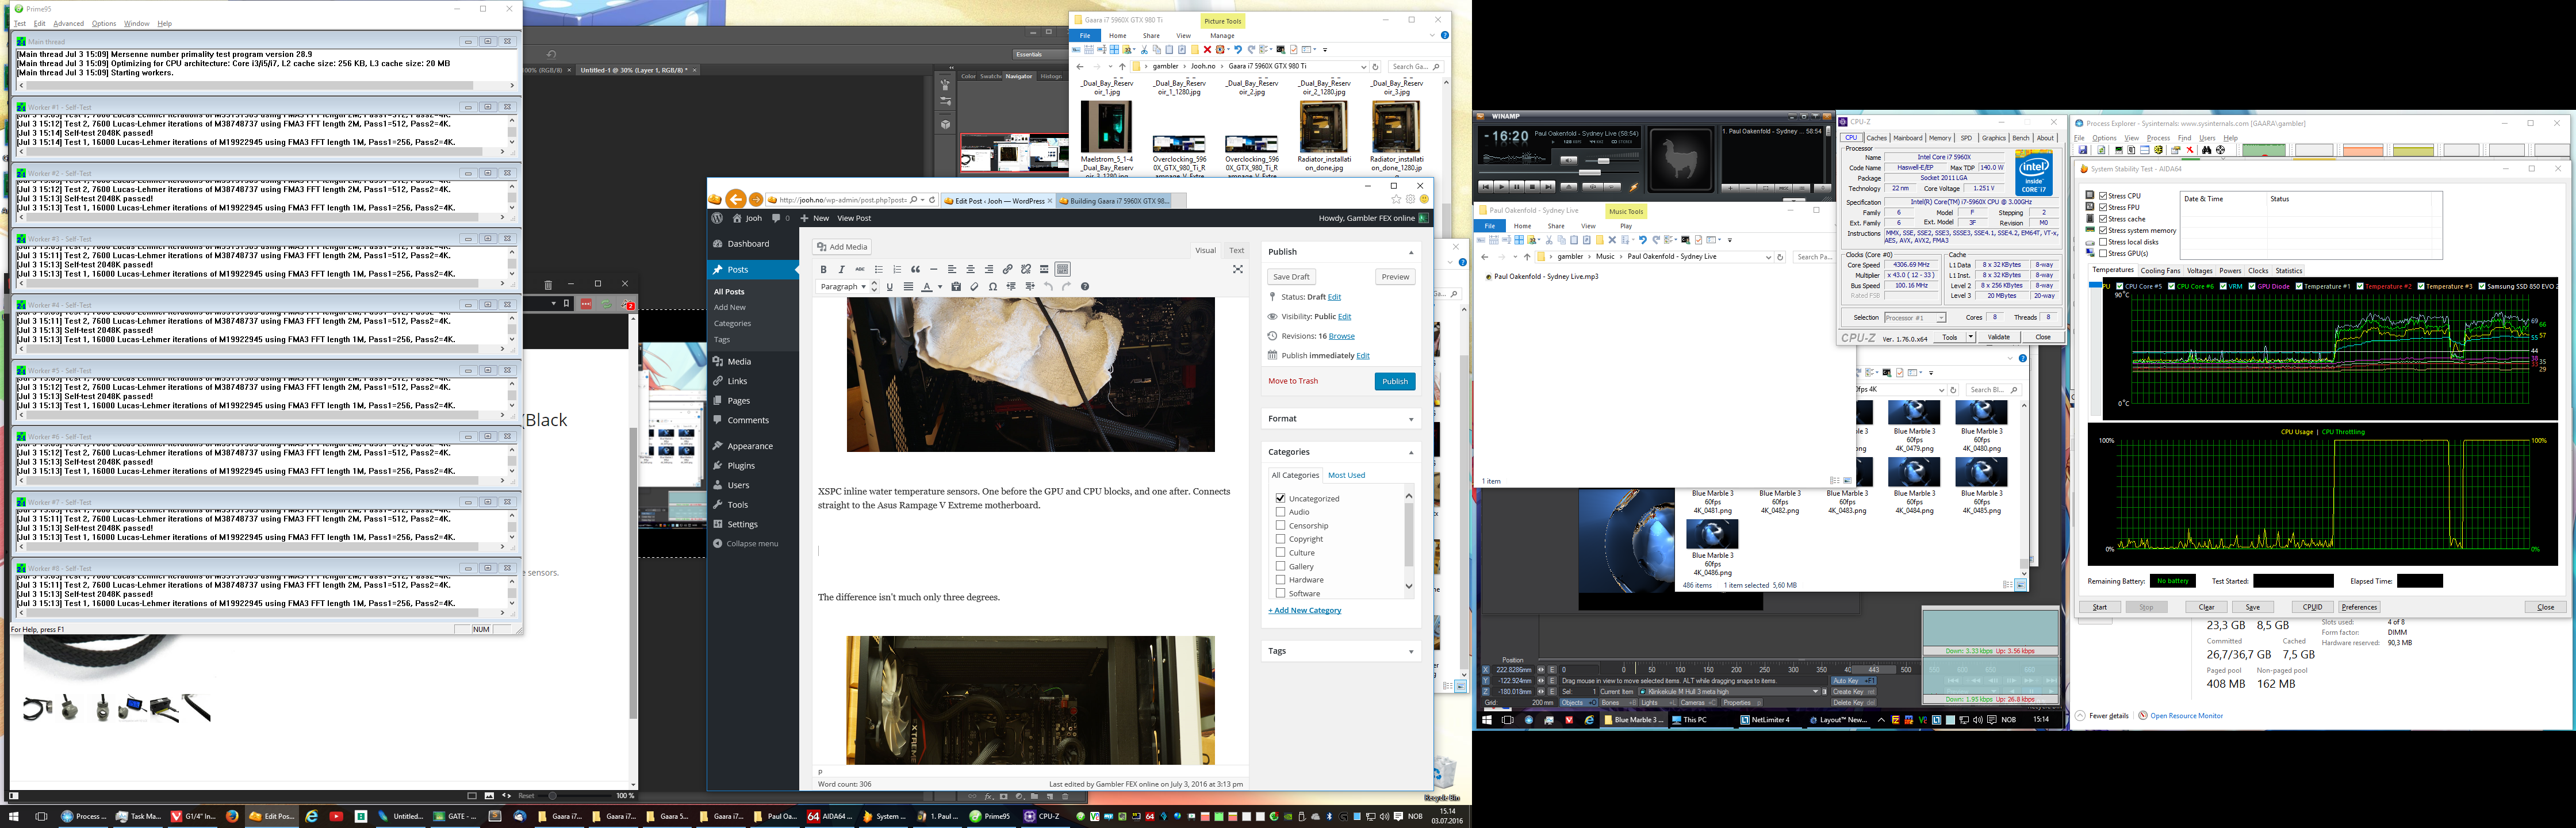
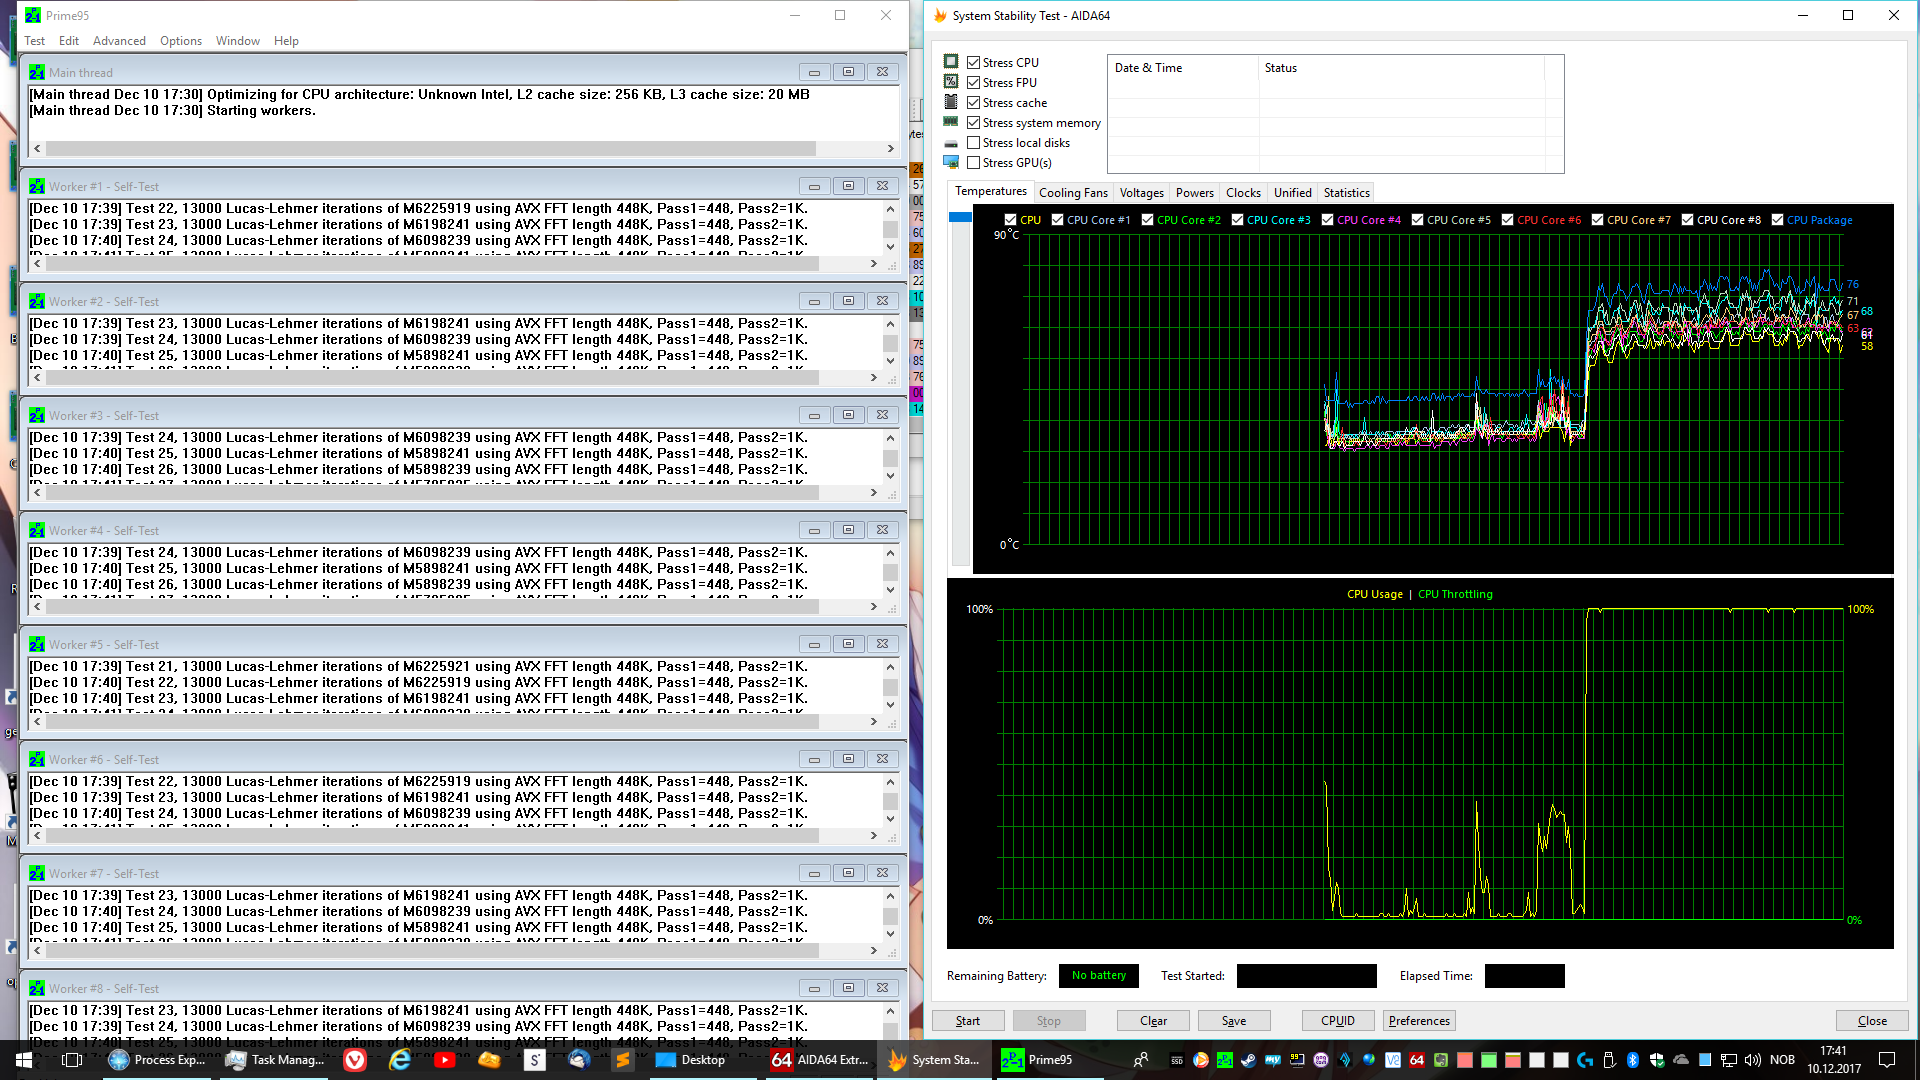
I tried Realbench but I got BSODs while I was playing Fallout 4. I checked with Prime95, and there you have it – zero minutes then error. Today I run it at 4.375GHz with 1.25vcore and 3000MT/s memory. The GPU is running at 1202MHz and GPU memory at 1833MHz. I use Prime 95 28.9 with AVX support here. I set it to Blend then custom to test the ram too, and set min FF size to 1024 so I don’t burn out the AVX engines.
I have disabled HT because I want to see how much CPU games really use, and sometimes HT is reducing FPS in games
Fan shrouds on and power on.
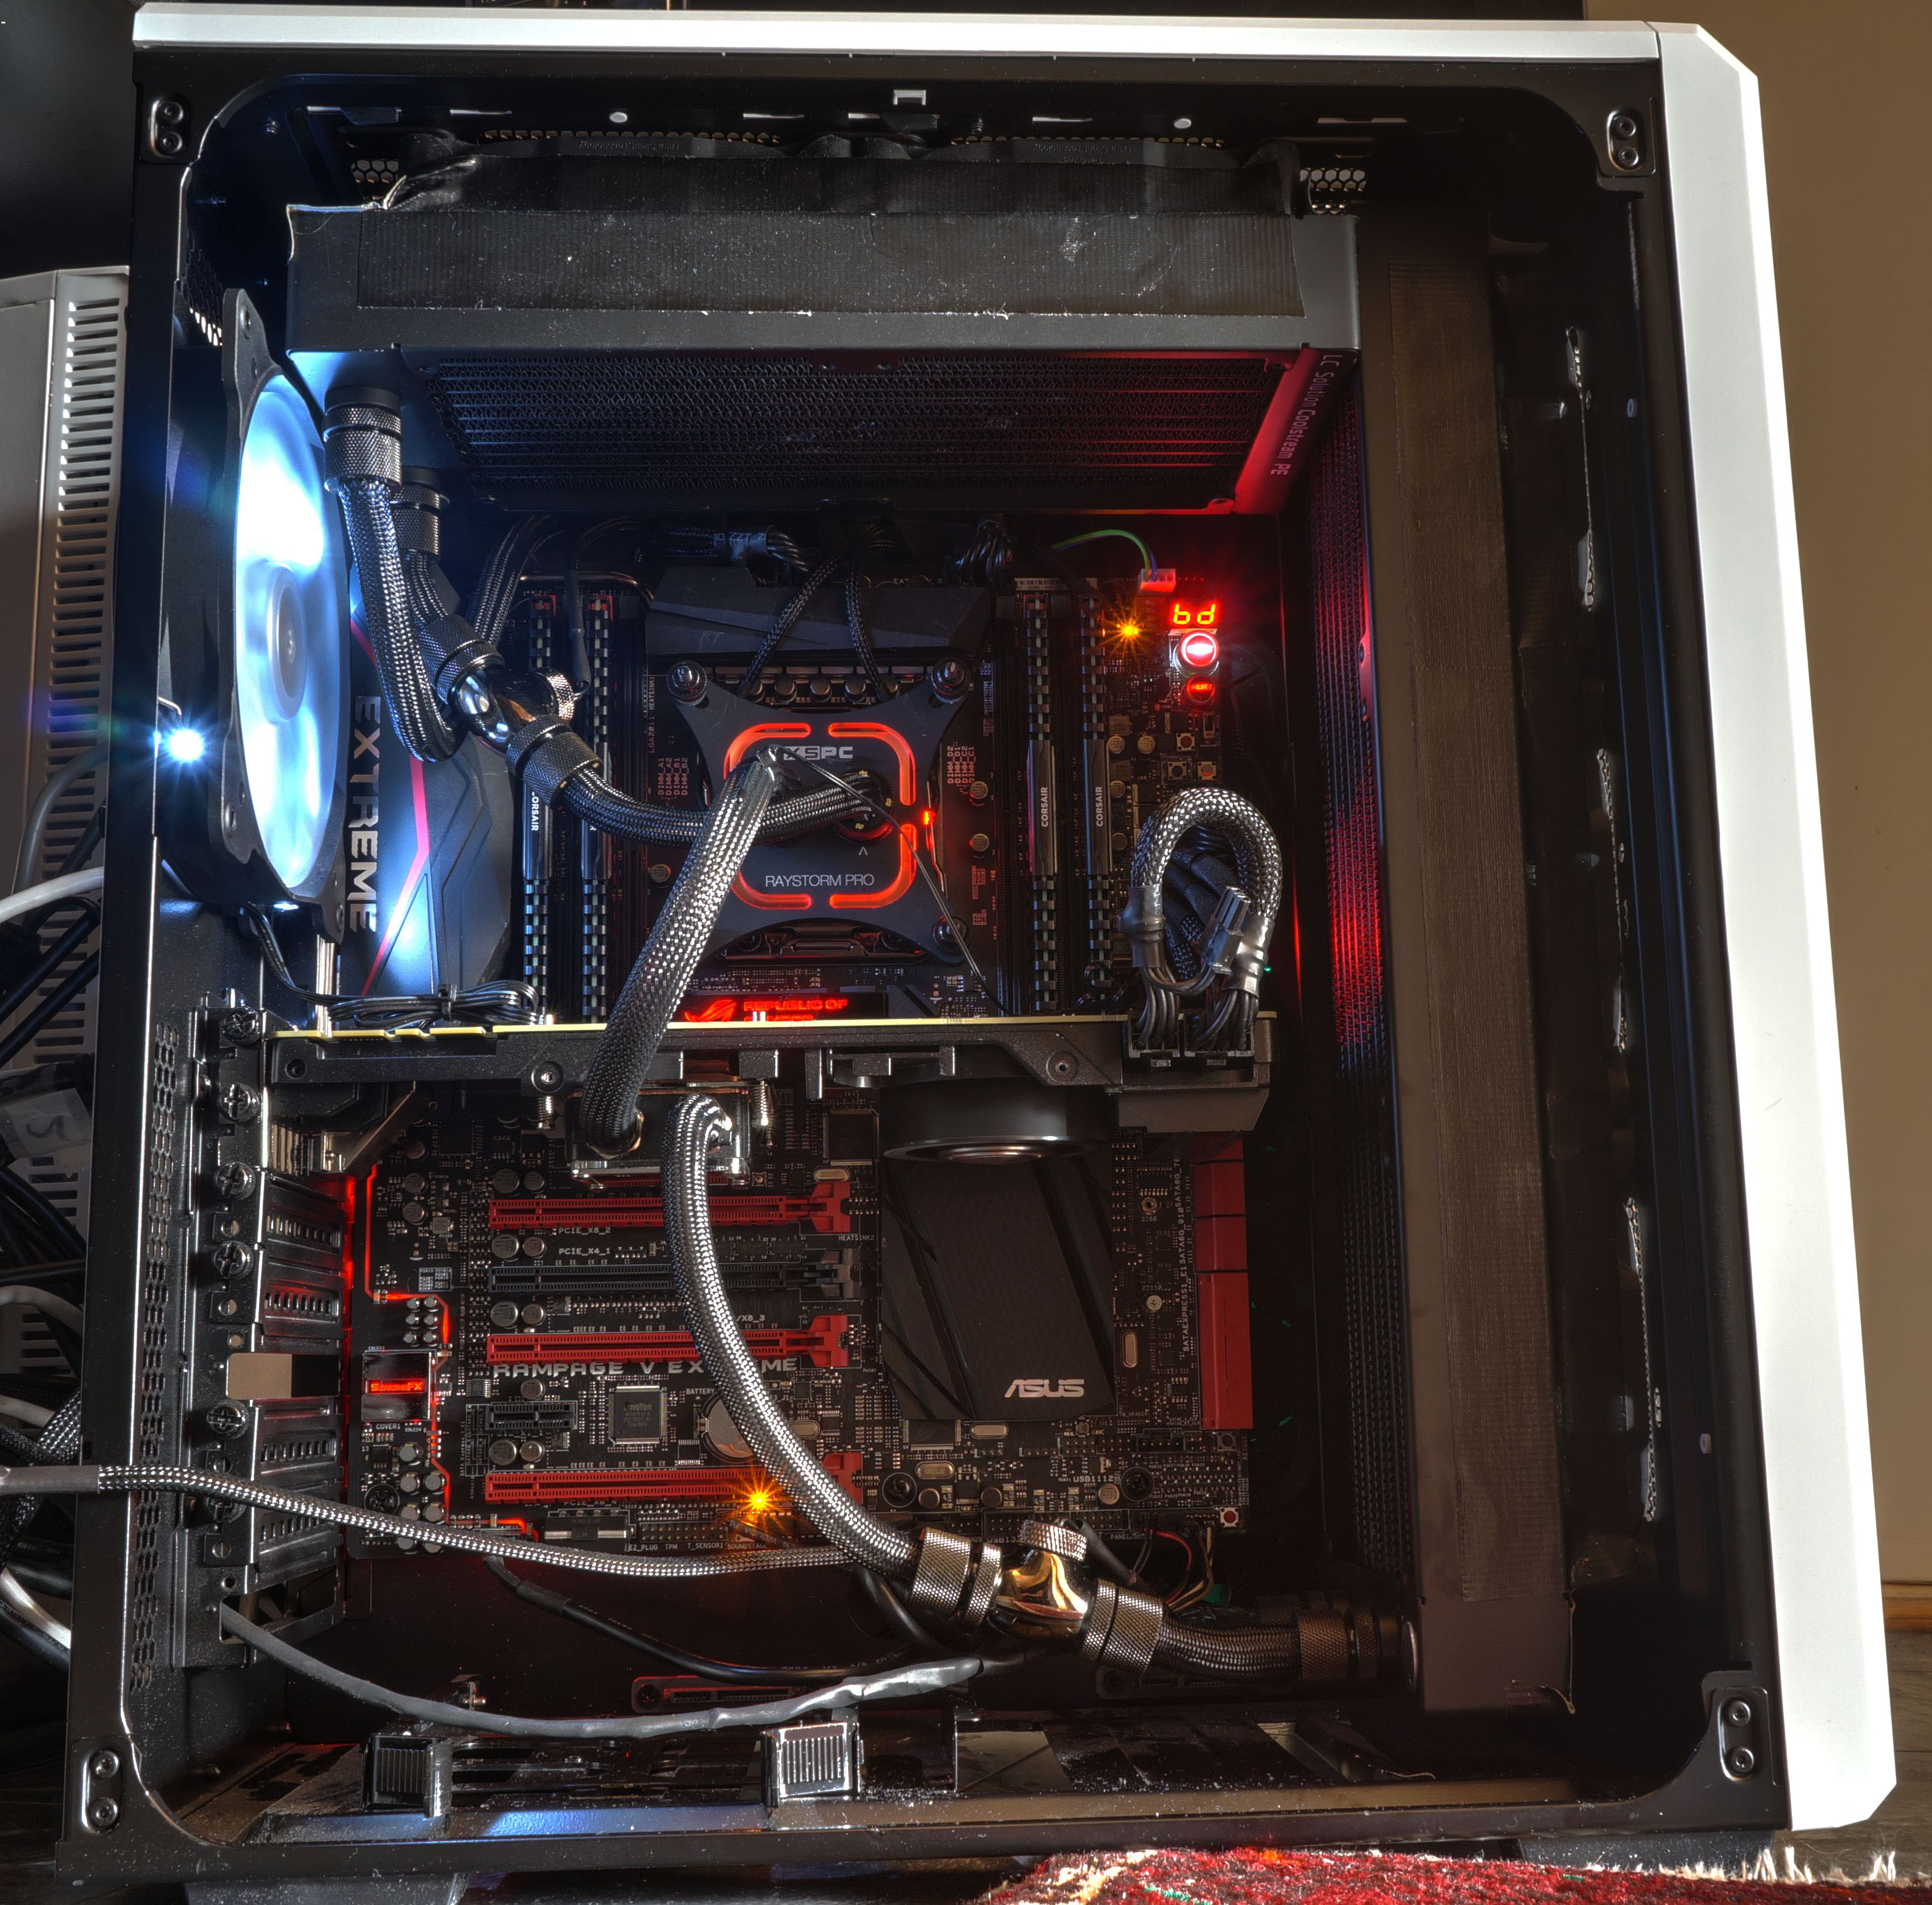
Here is a final shot with the power on and some light HDR tonemapping. Here I have installed the XSPC RayStorm Pro but it gave me much worse temperatures in Prime95 so I reverted back to the vanilla RayStorm.
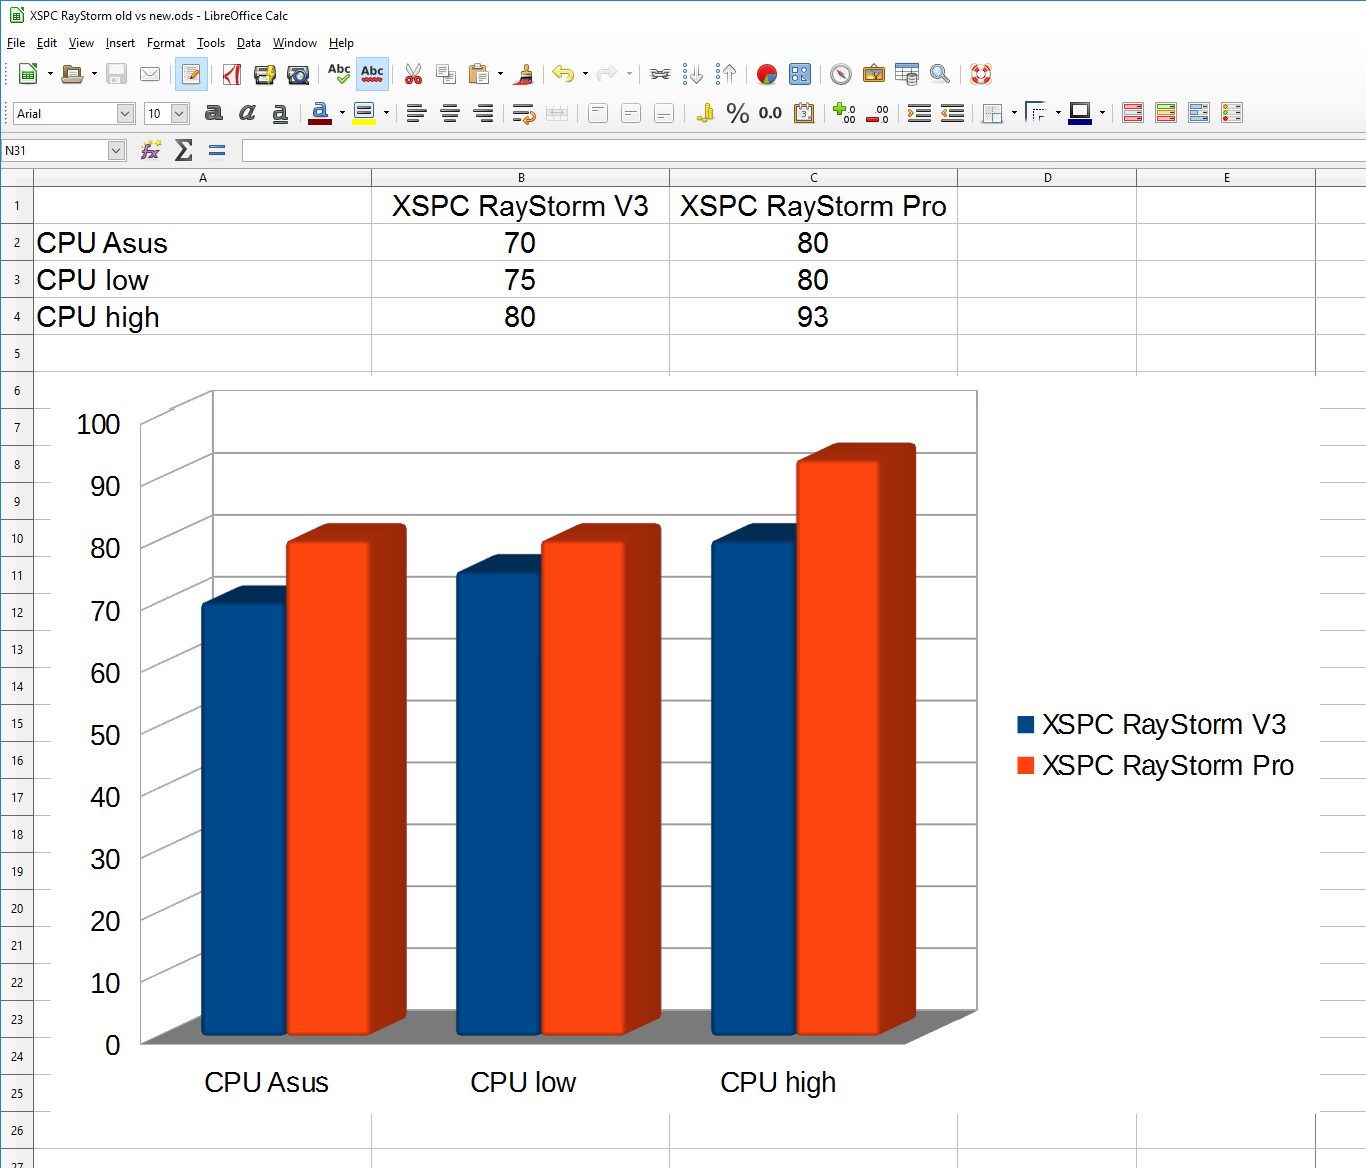
Here is the temperatures from XSPC RayStorm V3 and XSPC RayStorm Pro. The Pro is 10 to 13 degrees celsius hotter. The RayStorm Pro is bulging so it has a closer contact at the center where the CPU dies is and I didn’t use the supplied mounting harness on it but the one for the RayStorm V3. The supplied mounting harness for the Pro is balanced while the one for the RayStorm V3 you just screw the screws down. This might be the cause. I’ll hopefully check this again one day.
Update!
I finally looked into this some more, and it seems it was the mounting harness. When I used the ones that came with the RayStorm Pro everything was fine. In fact, it was a bit better than the vanilla RayStorm.
Look at these results: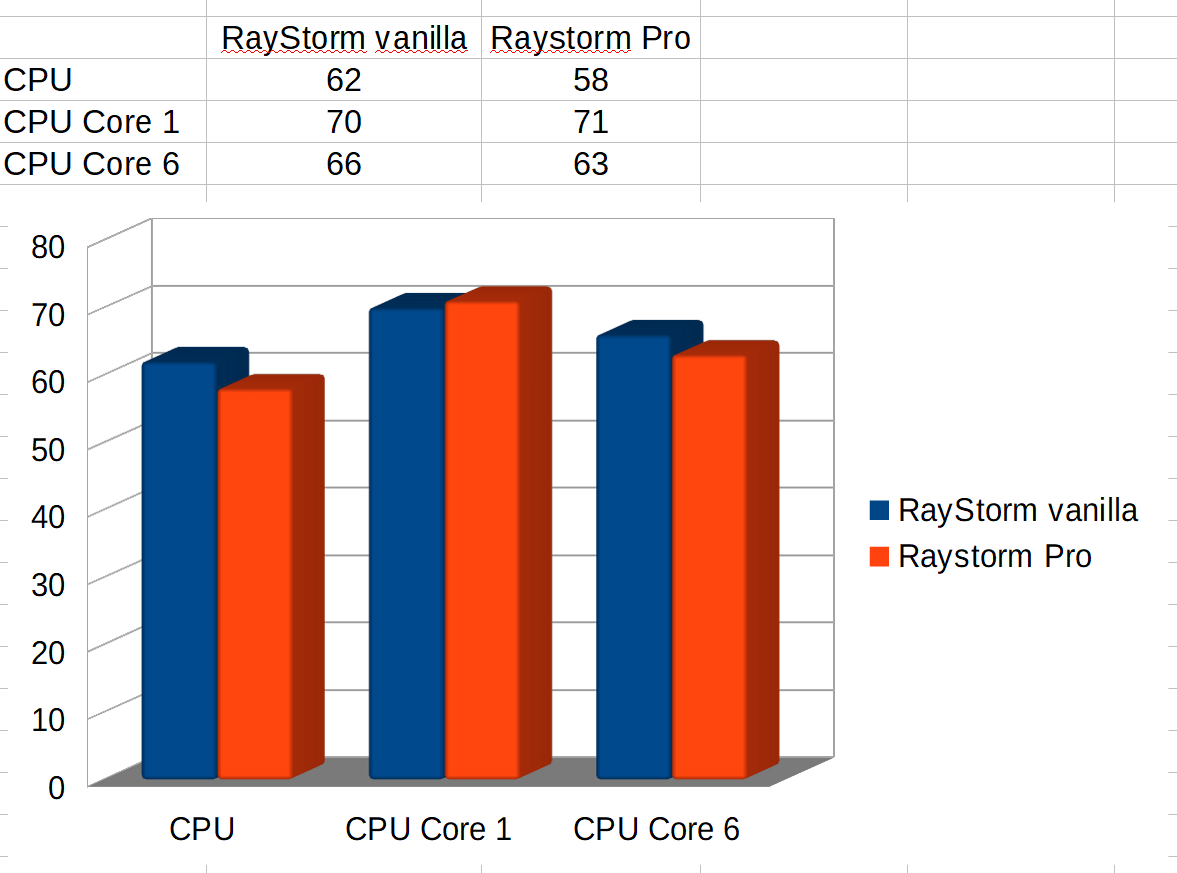
Here is the AIDA temperature results in detail:
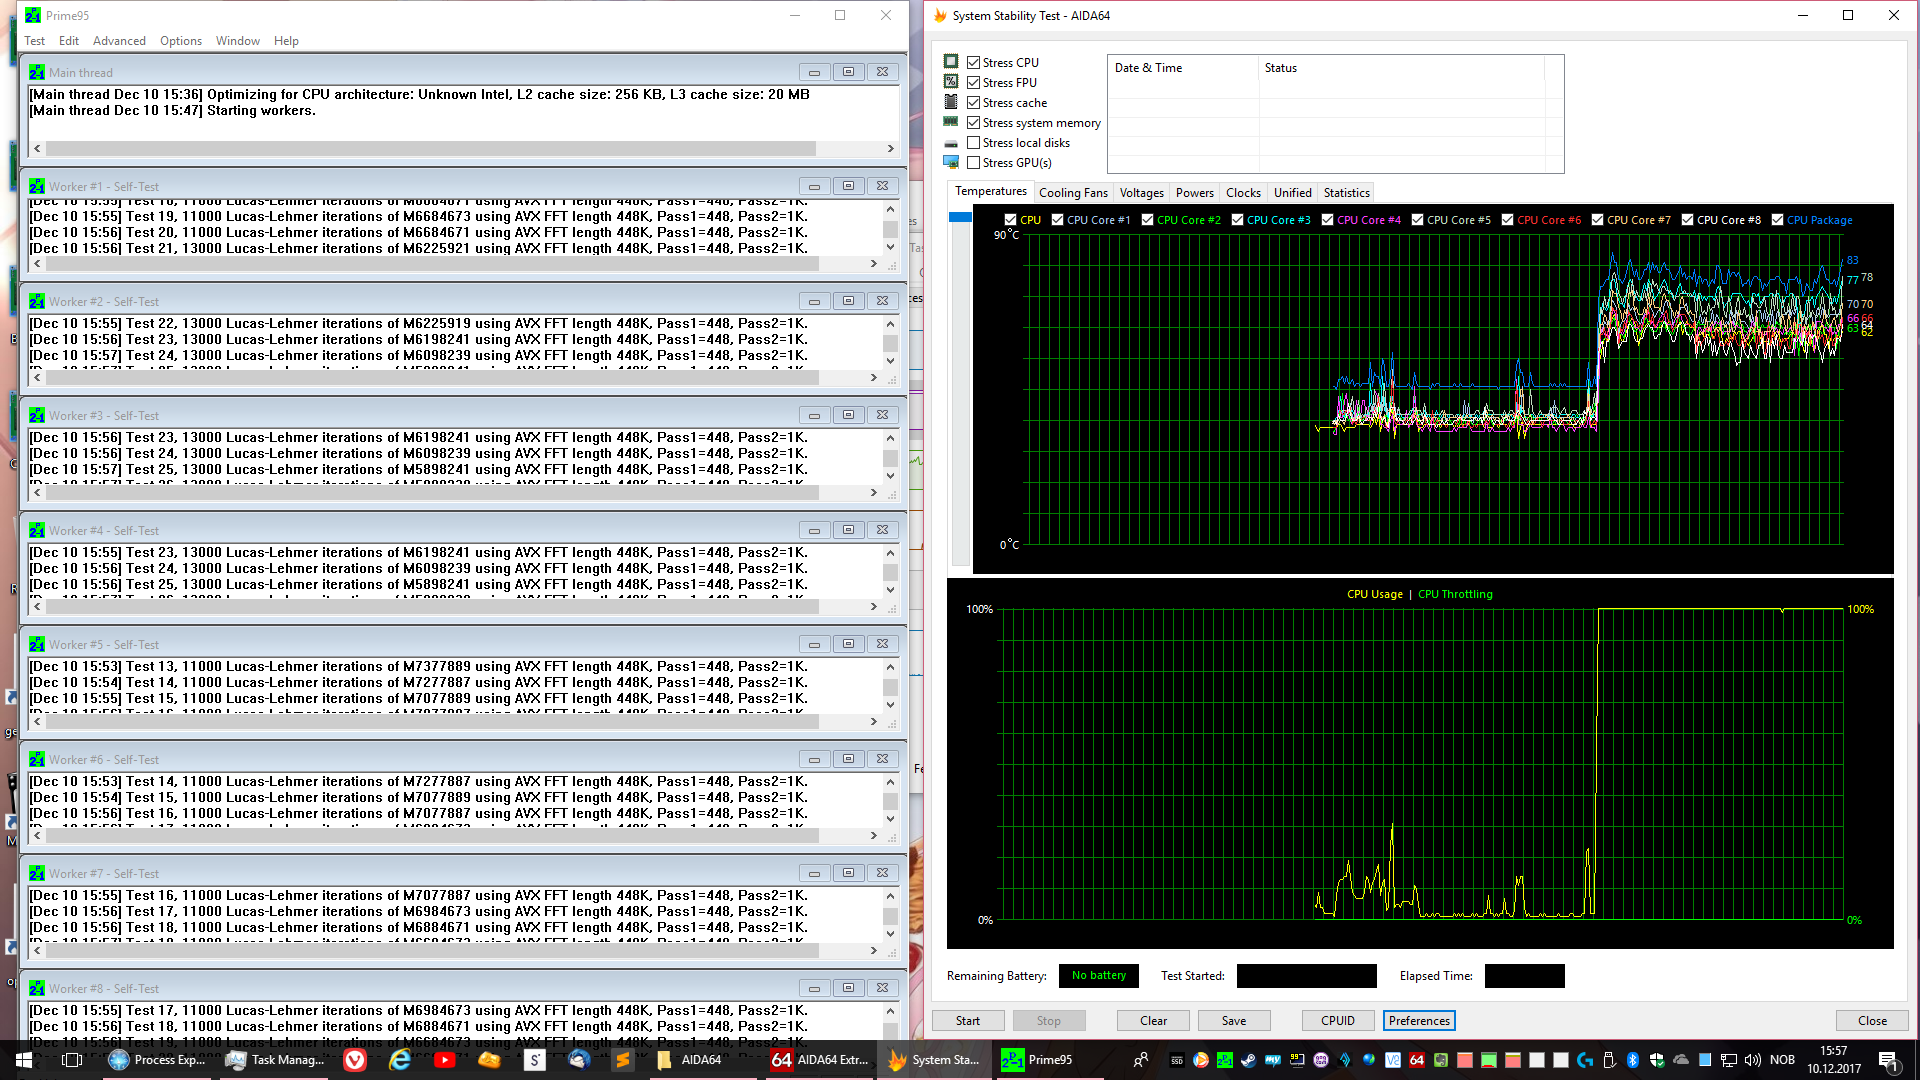
RayStorm vanilla Prime 95
RayStorm Pro mounted properly with original caps

Here it is the RayStorm V3 vanilla in its LED glory.
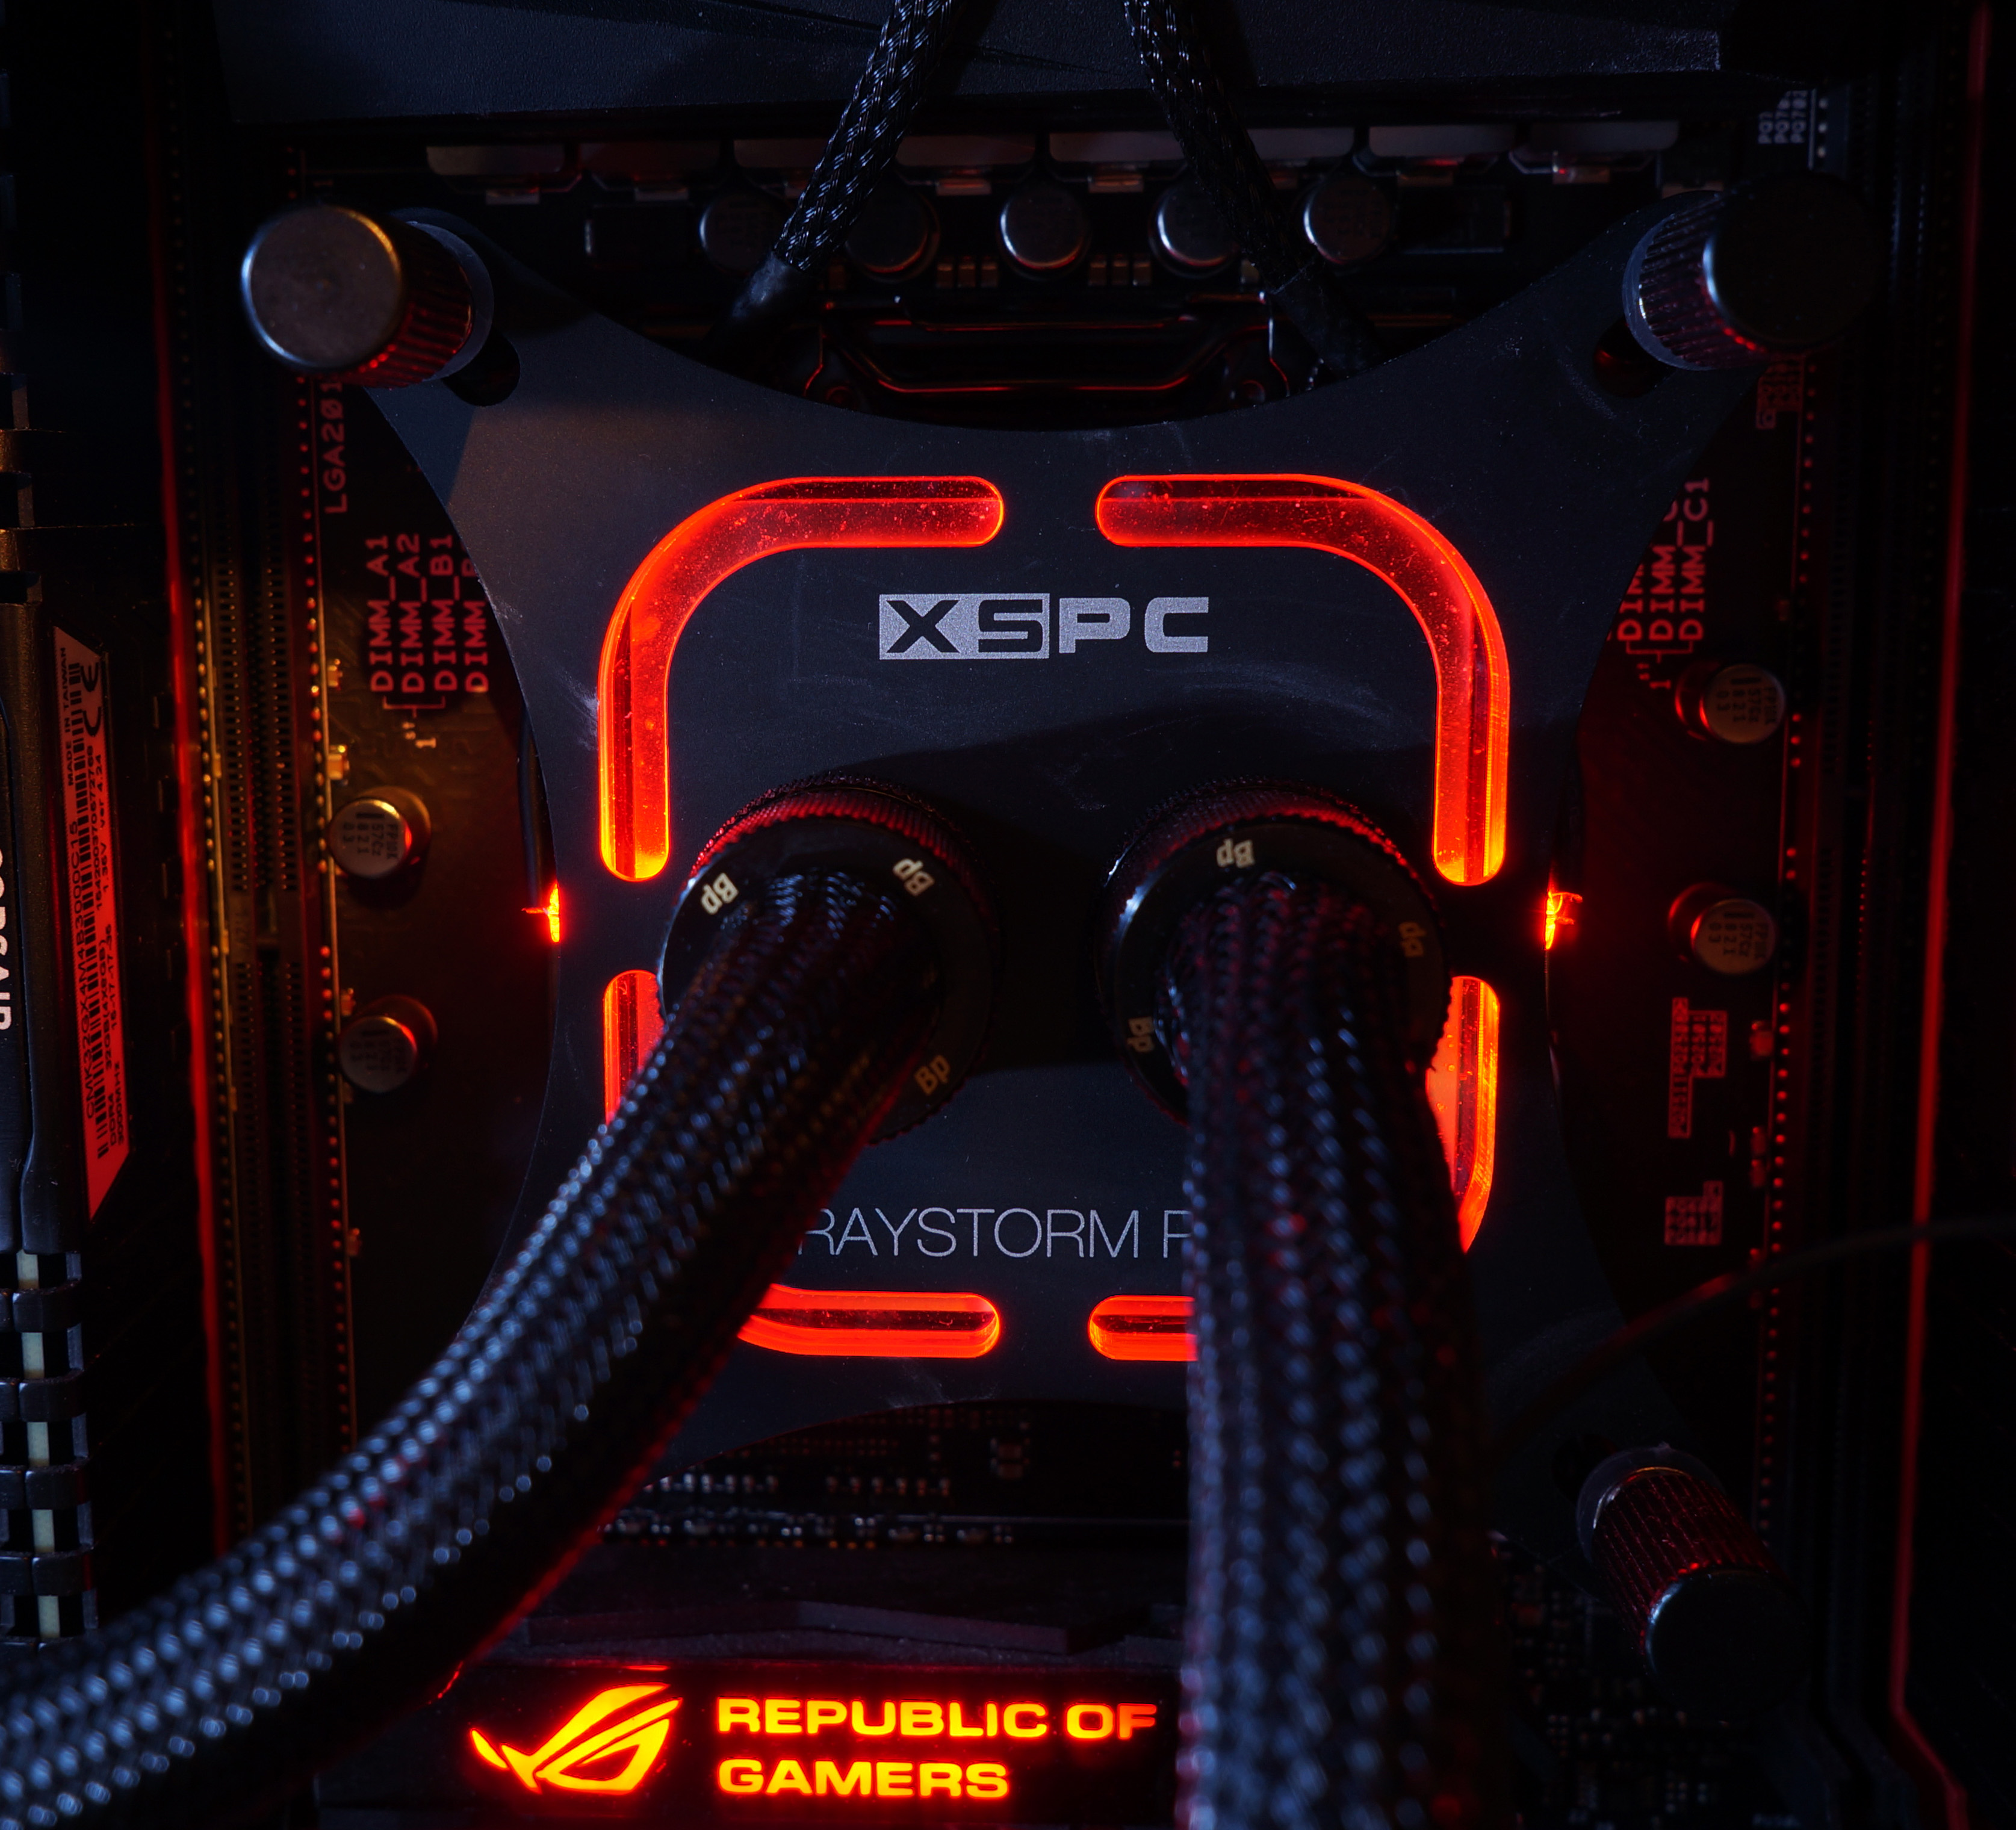
And here is the RayStorm Pro. Pretty blinkenlights.